
I recently worked on a project to improve my ML skills where I was trying to build my pipeline to detect objects in images. However, I found that there were not a lot of tutorials or resources online for getting started with this. The ones that did exist were light on certain concepts, steps, or behaviors to fit my use case. So I decided to write this in depth tutorial on how to detect objects in images using machine learning with Azure Custom Vision.
As with my Node.js AWS Deployment tutorial, I hope to break this guide into small pieces and explain (a few) alternatives of each step we do.
For this project we'll be detecting stop signs in images, however the same concepts apply to any type of object.
Label
The first stage of any machine learning workflow is to gather data for your machine learning model.
By the end of this section you should have images, and some type of data for each image representing the label and bounding box of the label in the image.
Gathering Data
There are a few great places to gather data for your machine learning model. The first is to just gather the data yourself or crowd source it. However for this example that isn't really plausible, so there are a few places that I have found useful for gathering data.
- Unsplash is a great resource for "freely-usable images" that you can download.
- Pexels is another platform for "free stock photos" that has a very open license.
- Kaggle is a site with machine learning datasets. A lot of these datasets also look to be pre-labeled.
There are probably many more great resources to download images to use in your machine learning model. Therefore, I'd recommend searching around to gather images to use in your model.
There is a lot of theory about what goes into choosing good data. A lot of that is considered out of scope for this limited tutorial. But a few common suggestions include, having a good representation of data, and a large quantity of data. As in, if you are training a machine learning model on stop signs, having stop signs at different angles, different weather conditions, different sizes, etc, will increase the likelihood of a successful model. Additionally, so long as you continue to have a good representation of data, the more data you are able to input, the better the models tend to be.
It is important to note that Custom Vision will require at least 15 images per tag. So ensure that you have gathered at least 15 images for every tag you want to use.
Using VoTT to label data
VoTT or Visual Object Tagging Tool is an open source Electron application for annotating and labeling image and video assets.
You can download the tool for your operating system from the GitHub releases page.
From there, after launching the project you will be able to create a new project.
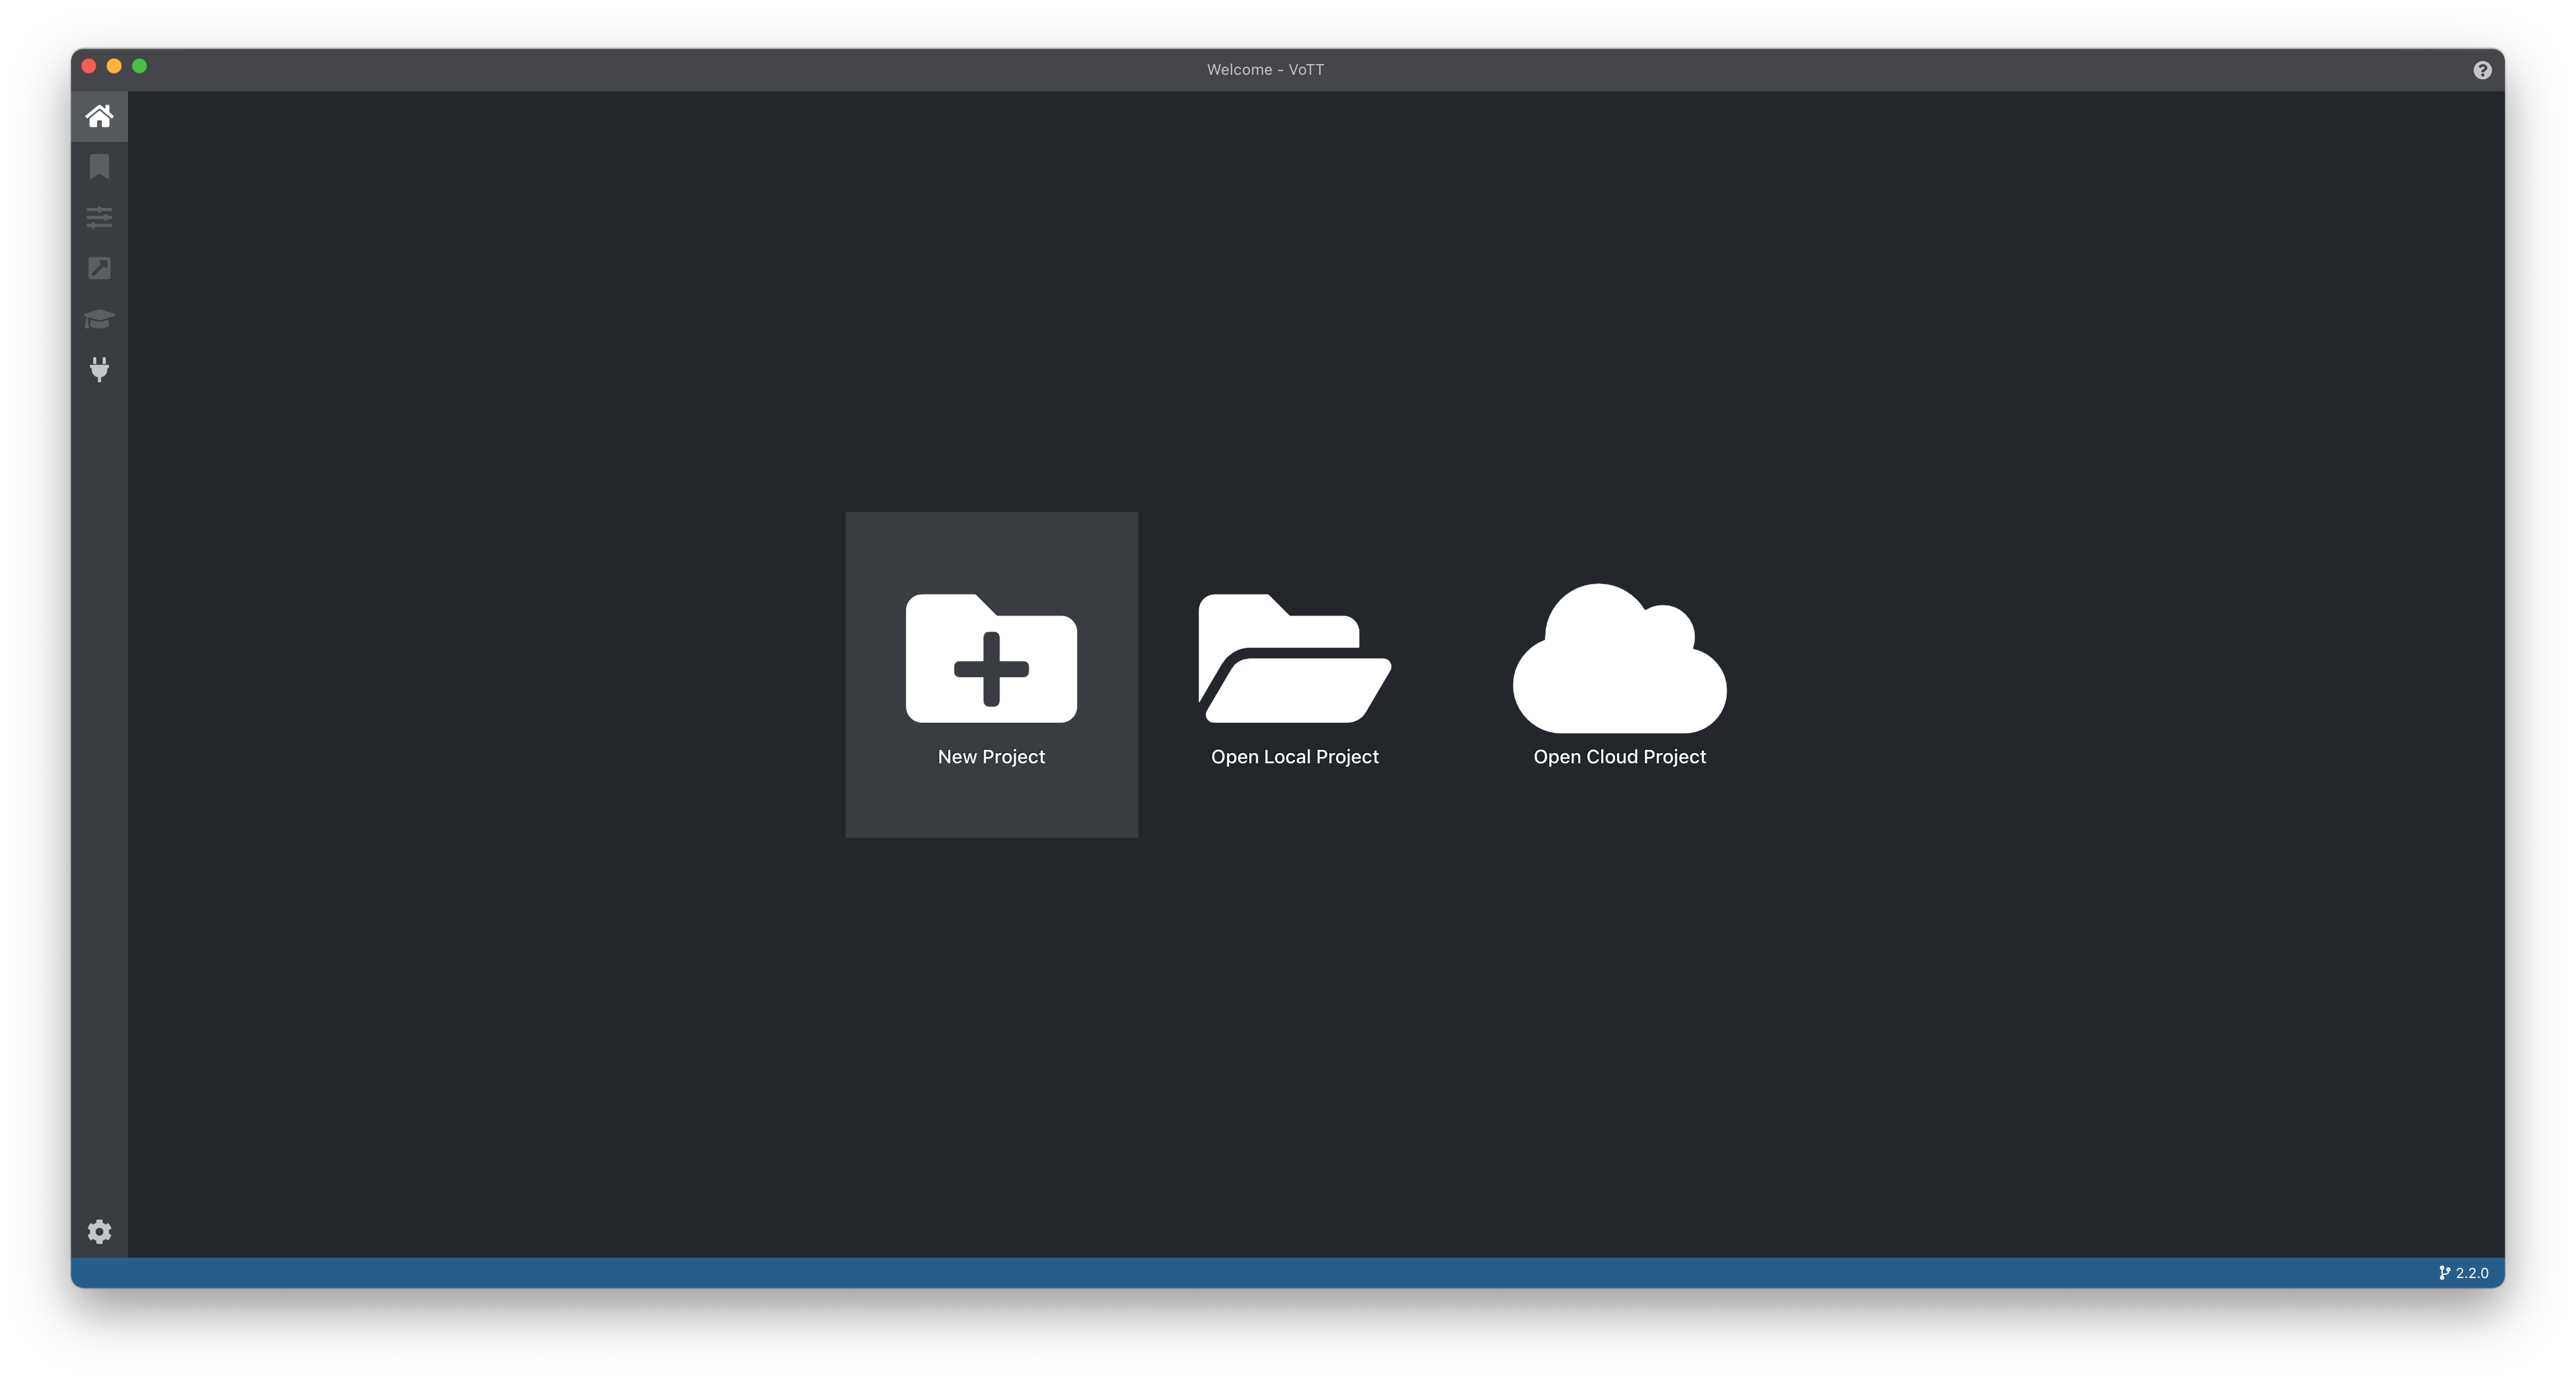
Fill out the following options:
- Display Name (required) - You can choose any name for your project here.
- Security Token - If this is a new project choose
Generate New Security Tokenotherwise, use the existing security token that you used for the project.
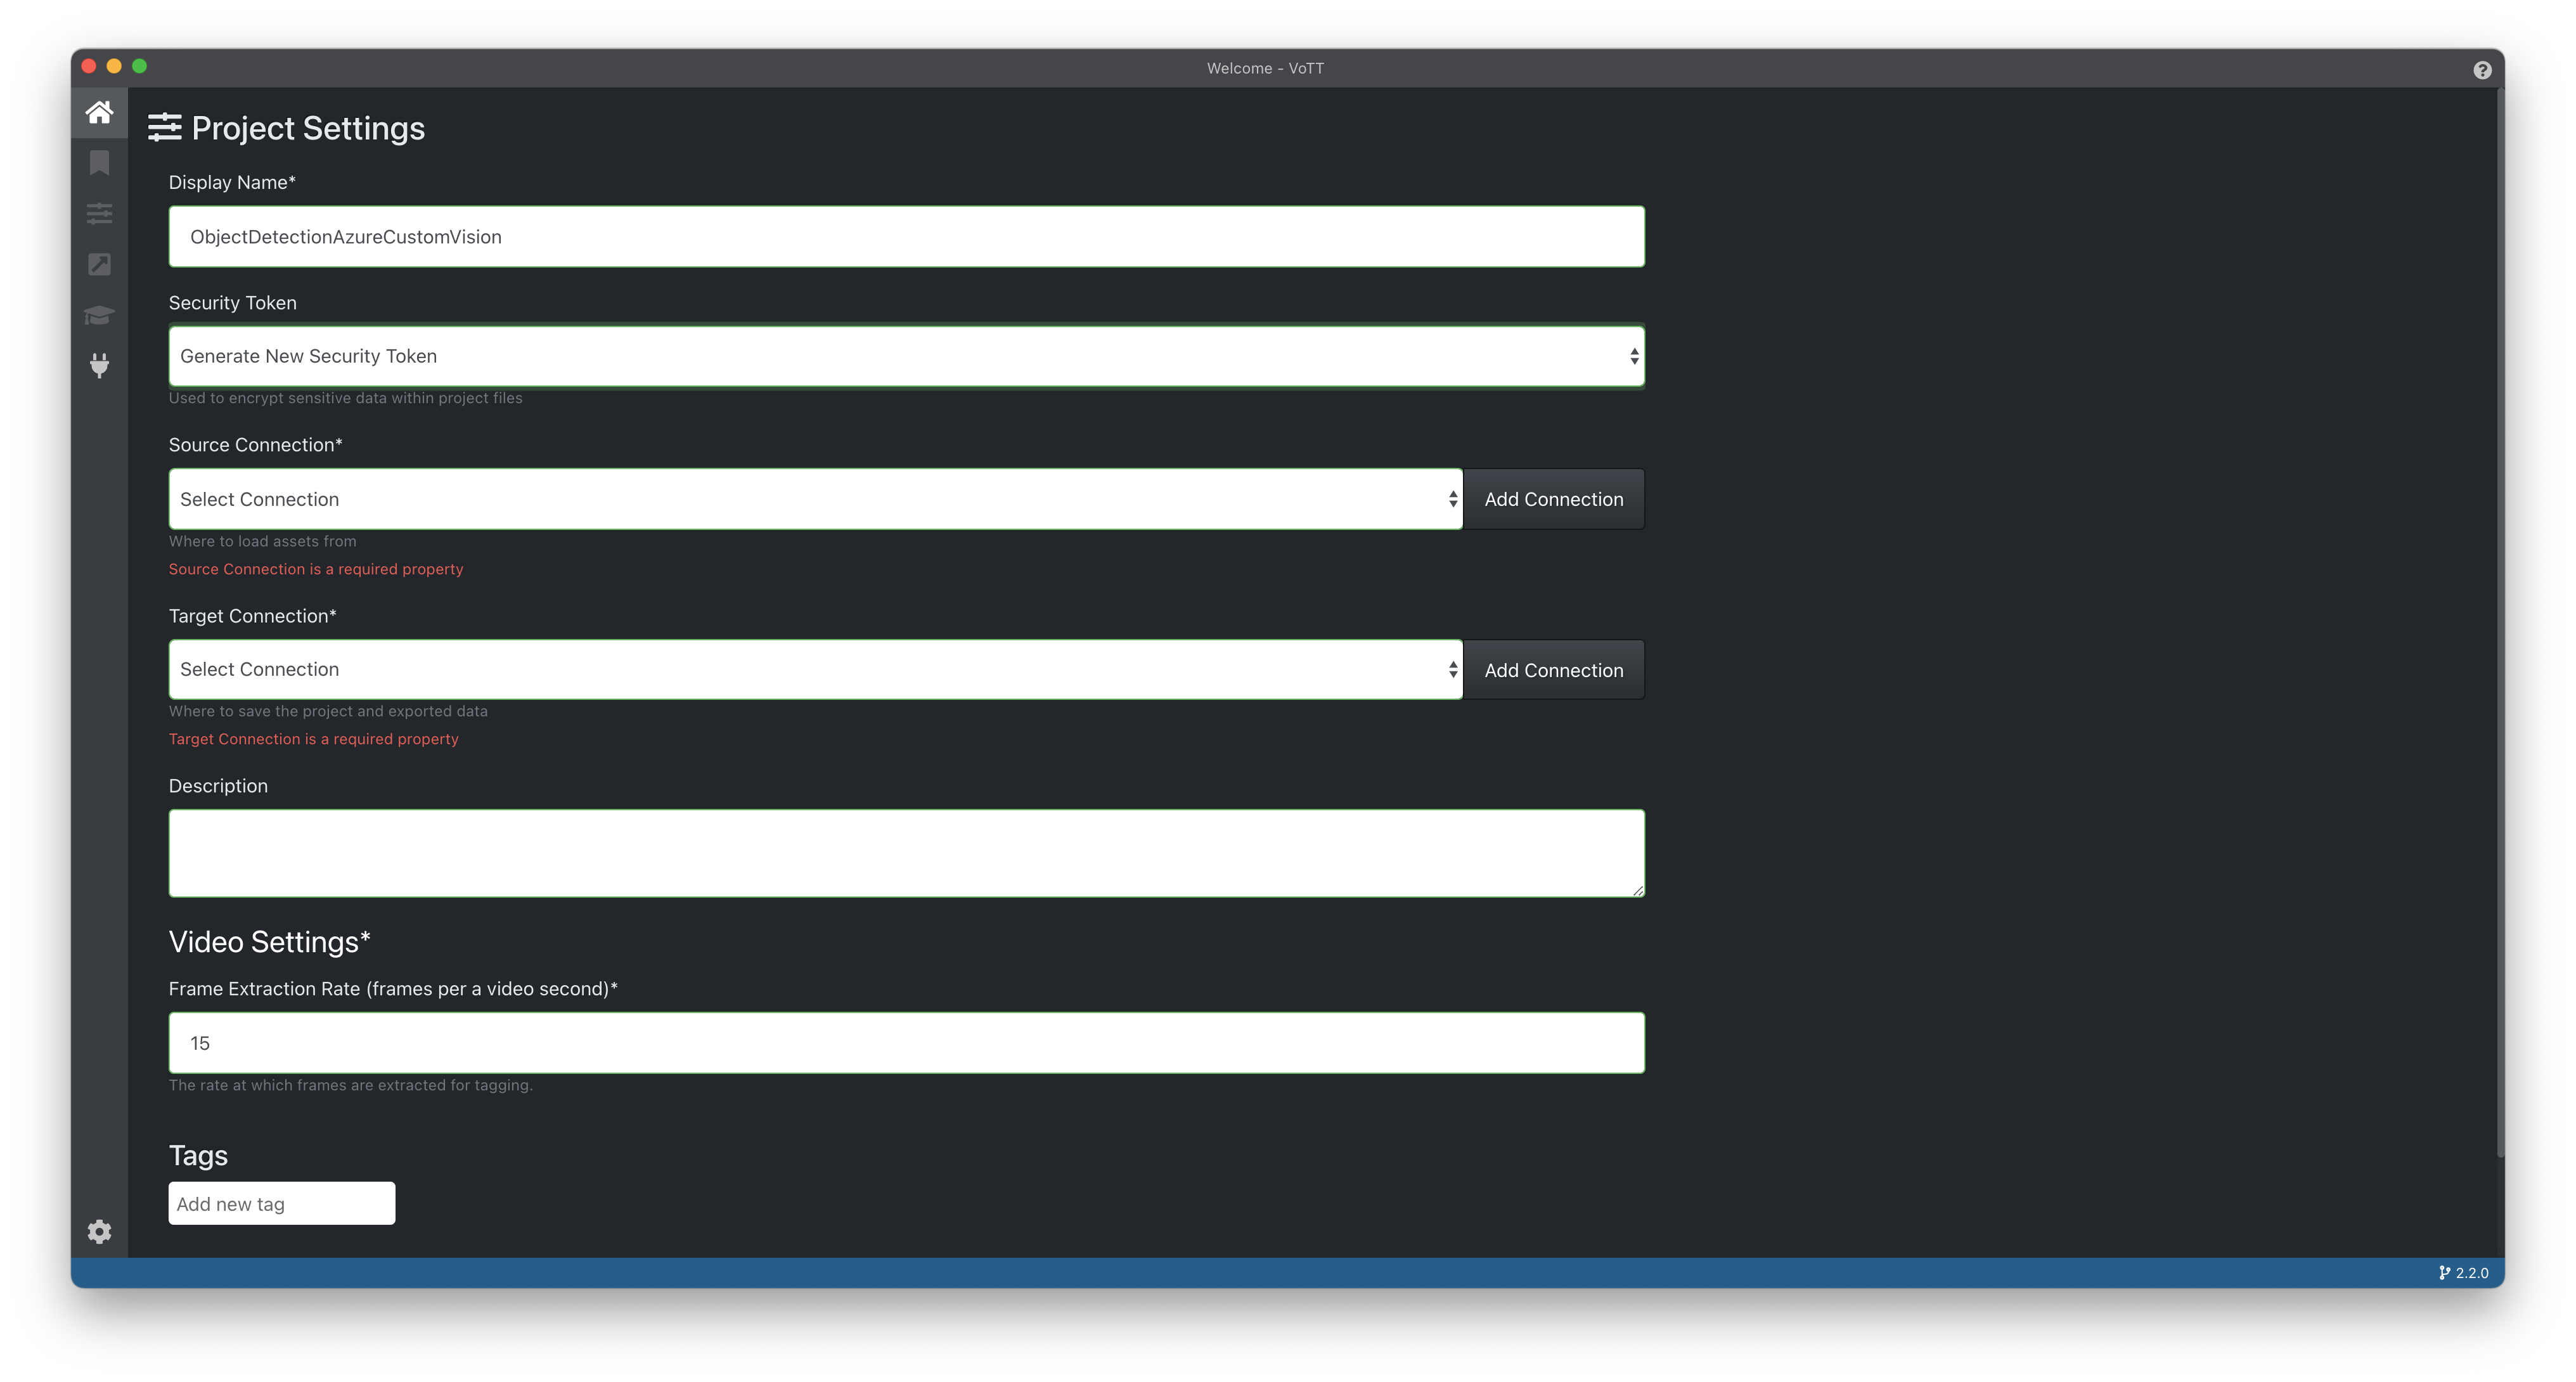
For the Source Connection option, you can click on the Add Connection button to the right of the dropdown.
Fill out the following options:
- Display Name (required) - I recommend using the name of your project followed by
-SourceConnection. However it is up to you what you want to use here. - Description - This field is optional, you can fill it out if you'd like.
- Provider - This is where your initial image data is stored. For us, we'll select
Local File System. - Folder Path - The folder where your source images (from the Gathering Data step) are stored.

Choose Save Connection, and select the new connection in the Source Connection dropdown.
Create a Target Connection following the same steps as above. This will be where the project and exported data will be stored.
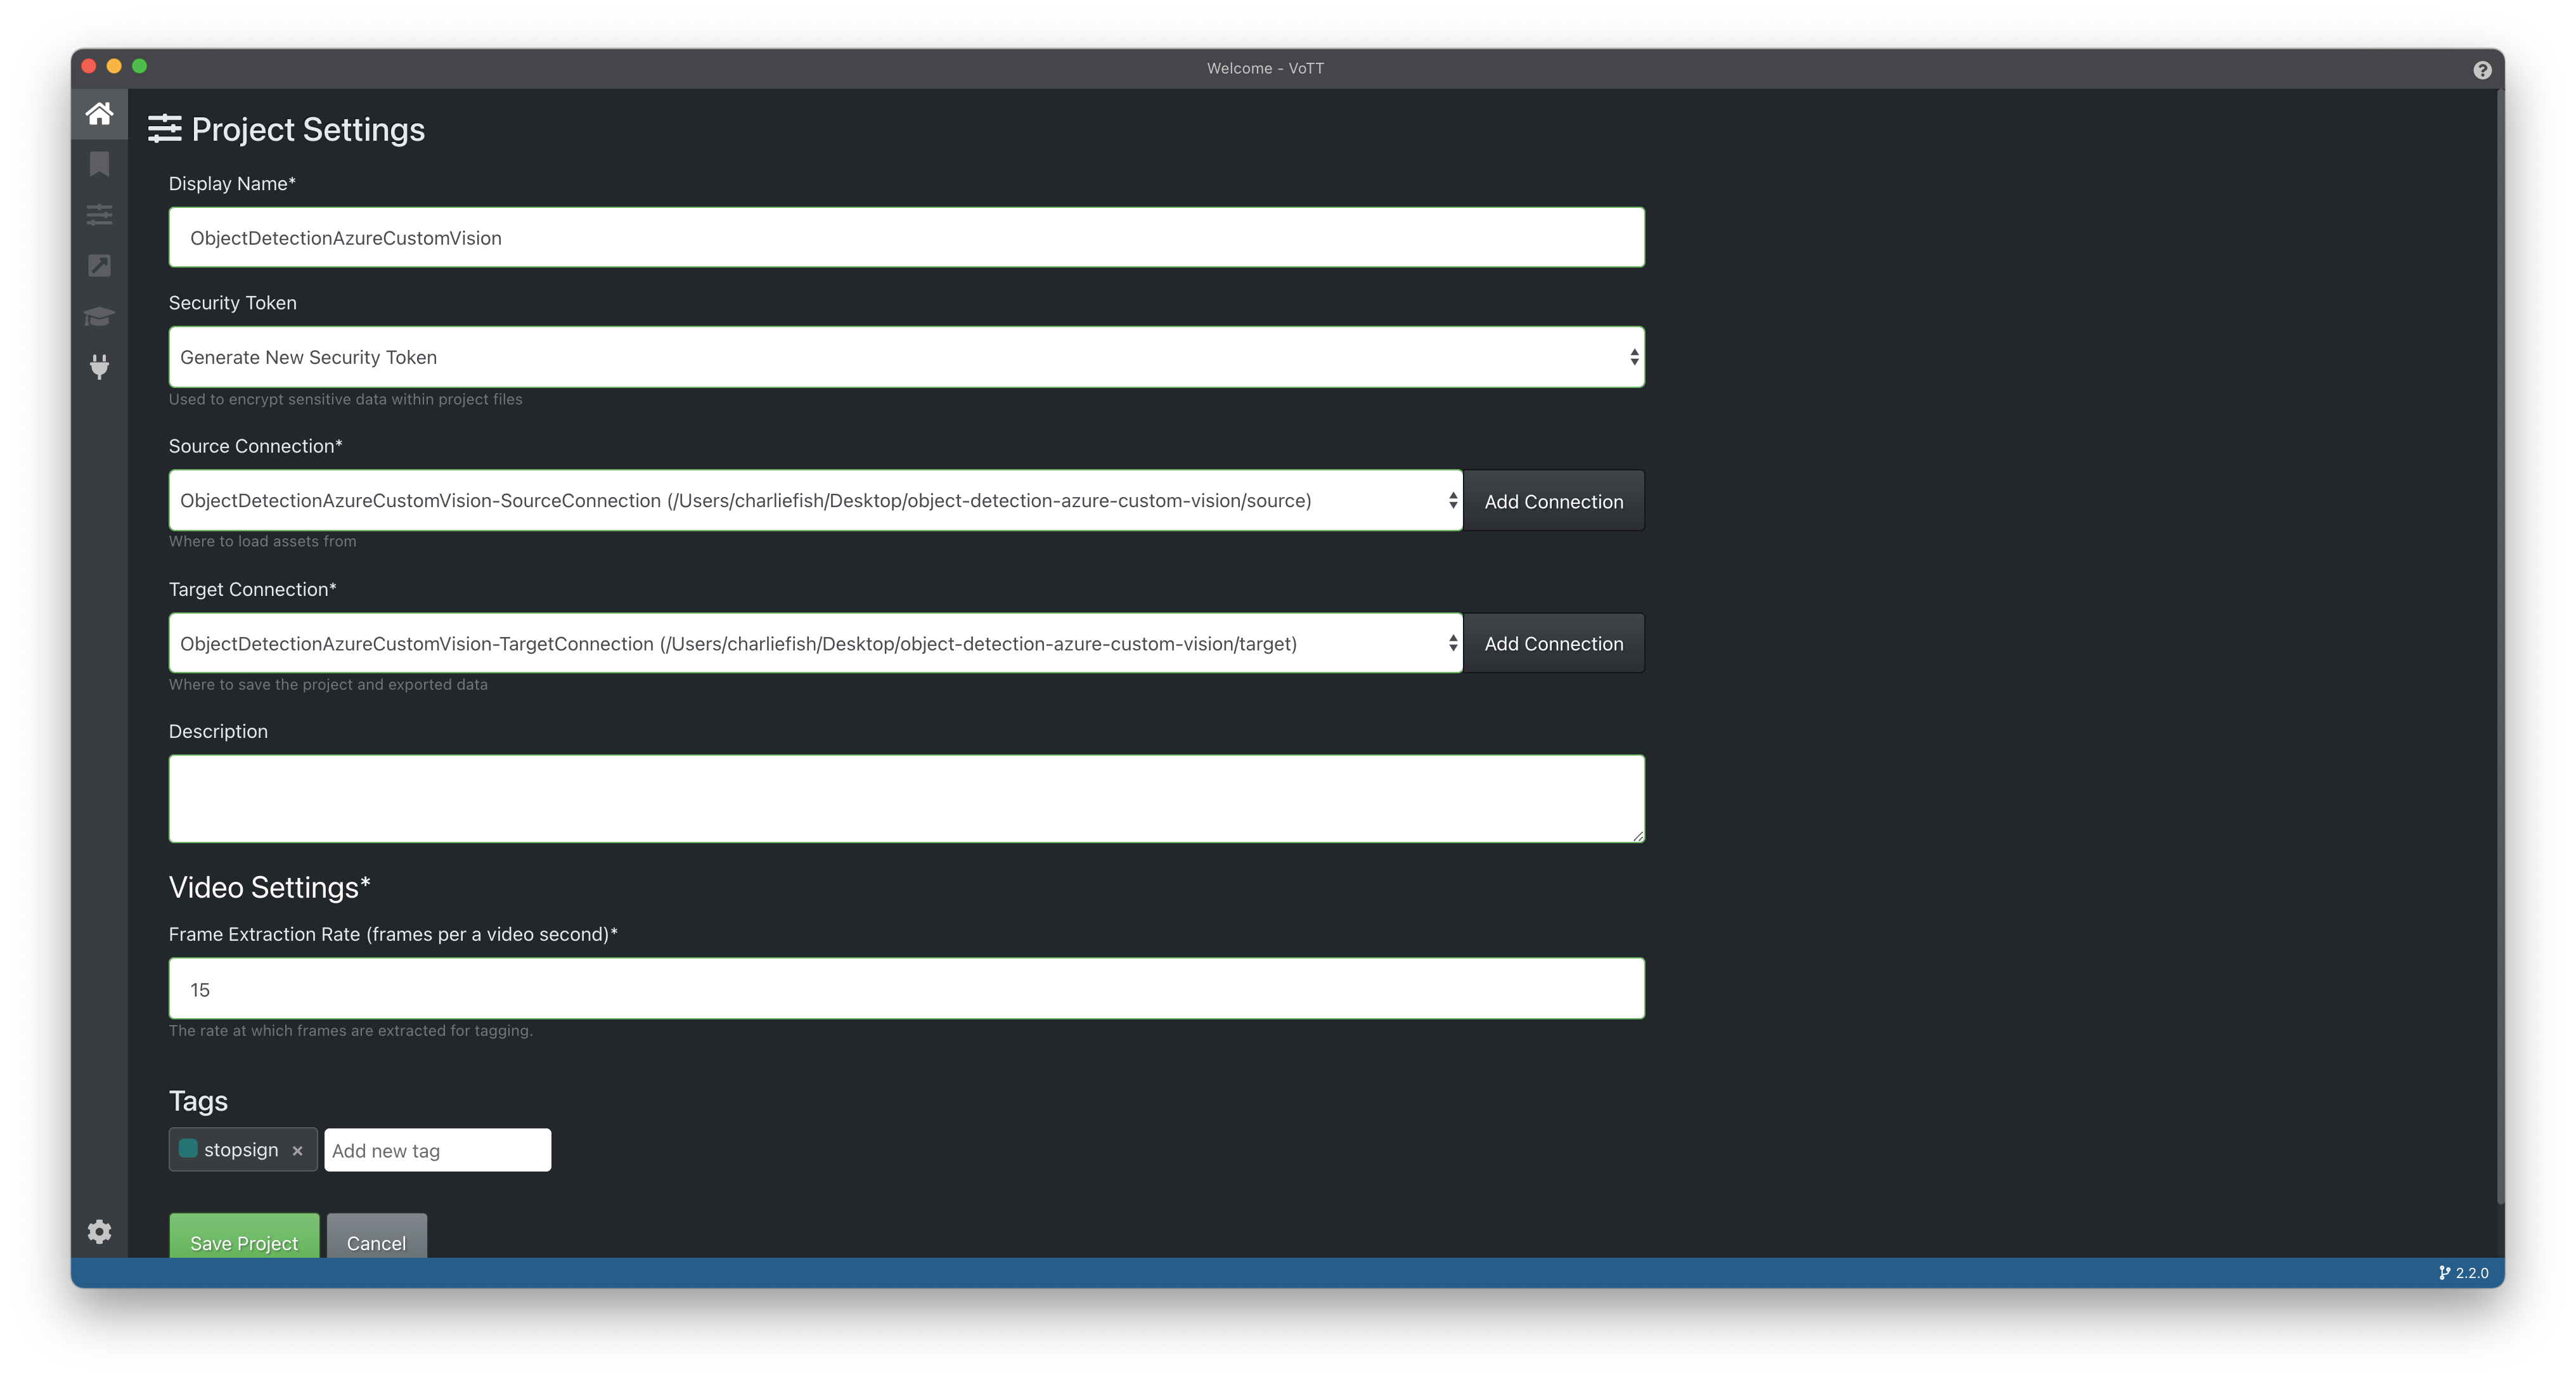
Final step to create our project is to add our tags. For example, if you are wanting to classify pets, you might have a tag for dog and another for cat. These are the output values you want the machine learning model to output. For our project we will use stopsign & onewaysign.
Confirm your settings look good and click Save Project.
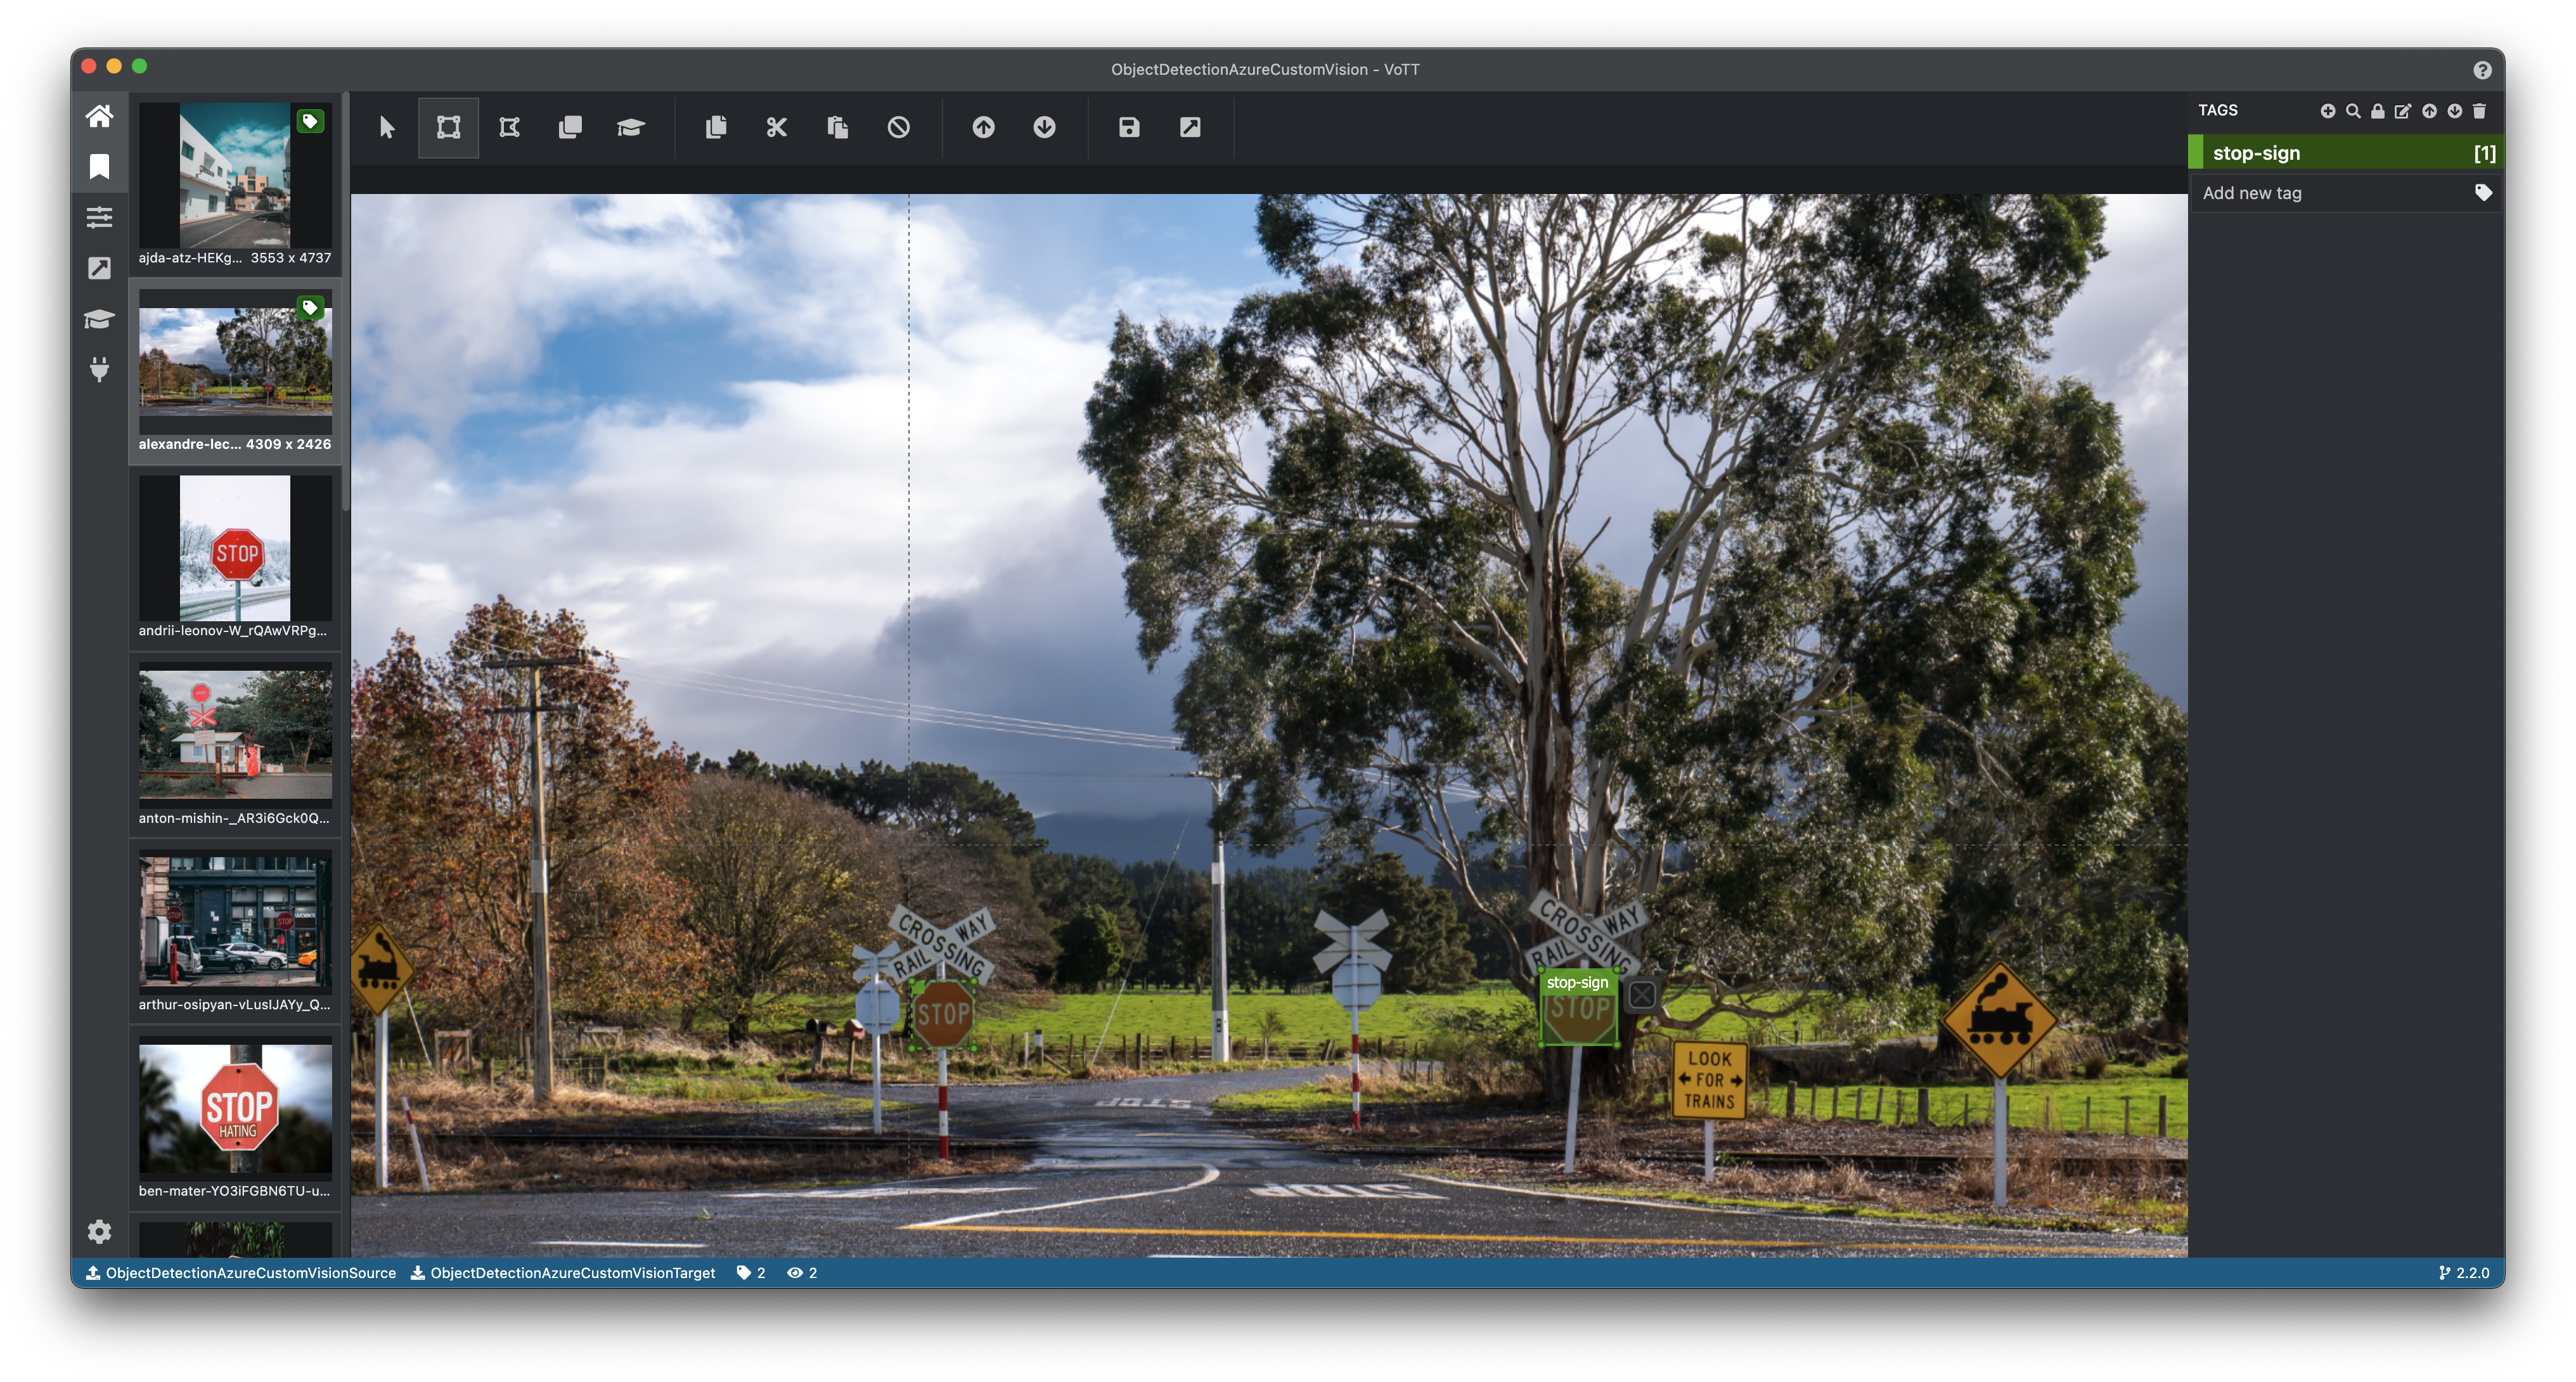
This will bring you to the main VoTT interface. Let's go over what all is included here.

From left to right on the top bar (seen in the screenshot above).
- Select (keyboard shortcut:
V) - Draw Rectangle (keyboard shortcut:
R) - Draw Polygon (keyboard shortcut:
P) - Copy Rectangle (keyboard shortcut:
Command or Control+W) - Active Learning (keyboard shortcut:
Command or Control+D) - Copy Regions (keyboard shortcut:
Command or Control+C) - Cut Regions (keyboard shortcut:
Command or Control+X) - Paste Regions (keyboard shortcut:
Command or Control+V) - Remove All Regions (keyboard shortcut:
Command or Control+DeleteorCommand or Control+Backspace) - Previous Asset (keyboard shortcut:
Up Arrow KeyorW) - Next Asset (keyboard shortcut:
Down Arrow KeyorS) - Save Project (keyboard shortcut:
Command or Control+S) - Export Project (keyboard shortcut:
Command or Control+E)
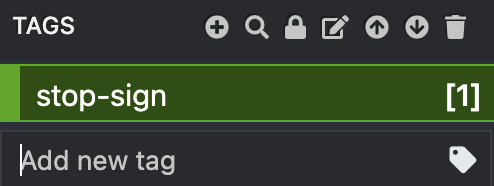
On the right side you can view the tags list. This is where you can add, remove, and edit tags. For now, click on Add new tag and type in your tag name. For this example we are going to use stop-sign.
Now it's time to start tagging our images. Click on an image on the left panel, and select the Draw Rectangle tool. Drag along the image to draw a rectangle around the stop sign. Then click on the stop-sign tag on the right panel. Repeat this process for each stop sign in the image. You can also hold the shift key while dragging to create a perfect square.
Repeat this process for each image. (Remember to periodically save your project to keep your work safe.)
Train
The next stage is to train your model. This is where we give the computer all of our tagged assets, and it will generate a model that we can use to classify our images.
Keep in mind we will be using Custom Vision for to train our model which does have costs associated with it. Please view my terms for more information. You are responsible for all costs associated with the steps you take here.
Create Custom Vision Project
The next step is to create a Custom Vision Project. First go to the Custom Vision website and sign in using your Microsoft account.
Once you get to the dashboard, click New Project.
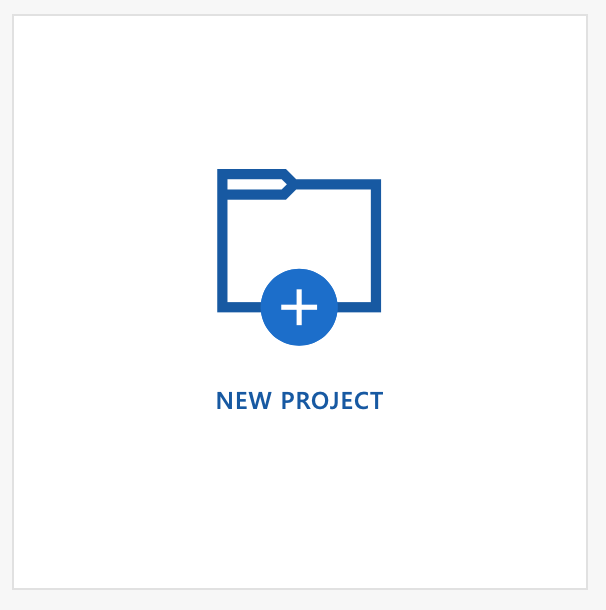
That will open a panel to fill out the settings related to your project.
First name your project, and optionally enter a description.
For Resource, there is a create new button you can use to create a new resource. Enter the resource name, choose your Azure Subscription and Resource Group. The rest of the settings you can leave as is (if you would like to change the location, you can).
For Project Types choose Object Detection.
Finally, for Domains, choose General (compact) [S1]. This will allow the model to be exported to more platforms (iOS, Android, TensorFlowJS, etc).
Once you have created your project, open it and click on the gear icon in the top right corner. On the right side save your Key. This key you will need in the next step to import your label data into Custom Vision.
Import label data into project
Now back in VoTT, on the far left side, click on the Export button (arrow pointing north east inside a box).

Choose Azure Custom Vision Service from the Provider dropdown.
For Asset State, you can choose to export all assets, only assets that have been tagged, or only assets that have been viewed within VoTT.
For the Region, choose the same region that you used when creating your project.
Paste your Key from the Create Custom Vision Project step into the API Key field.
Choose Existing Project from the next drop down.
And finally, choose your project from the final Project Name drop down.
Then, Save your Export Settings.
Navigate back to the tagging interface and click on the Export Project button. This will export your images and tag data to Custom Vision. Once complete, you should see all your images in your Custom Vision Training Images interface.

Train Model
The next step is to train your model. This can be done by clicking the green Train button in Custom Vision.
You can choose between Quick Training, and Advanced Training. The differences between the two is out of scope for this tutorial. I encourage you to read the Information panel that gives details about each.
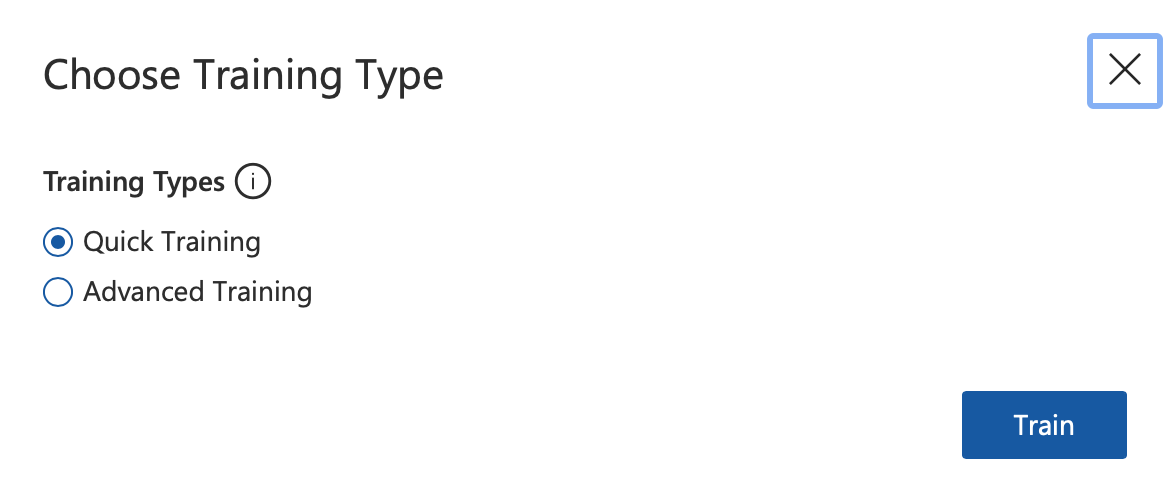
Click the Train button to start training your model.
Now take a break, and come back once your training is complete.
Predict
Now it's time to make predictions based on your trained model. This is where we will be using the model to classify new images.
You can go outside and take some photos of stop signs, or download more from the resources discussed in Gathering Data.
Predict using Custom Vision Quick Test
You can easily make predictions using the Custom Vision Quick Test interface. Next to the train button click the Quick Test button.
This will open an interface where you can select which image you would like to test.
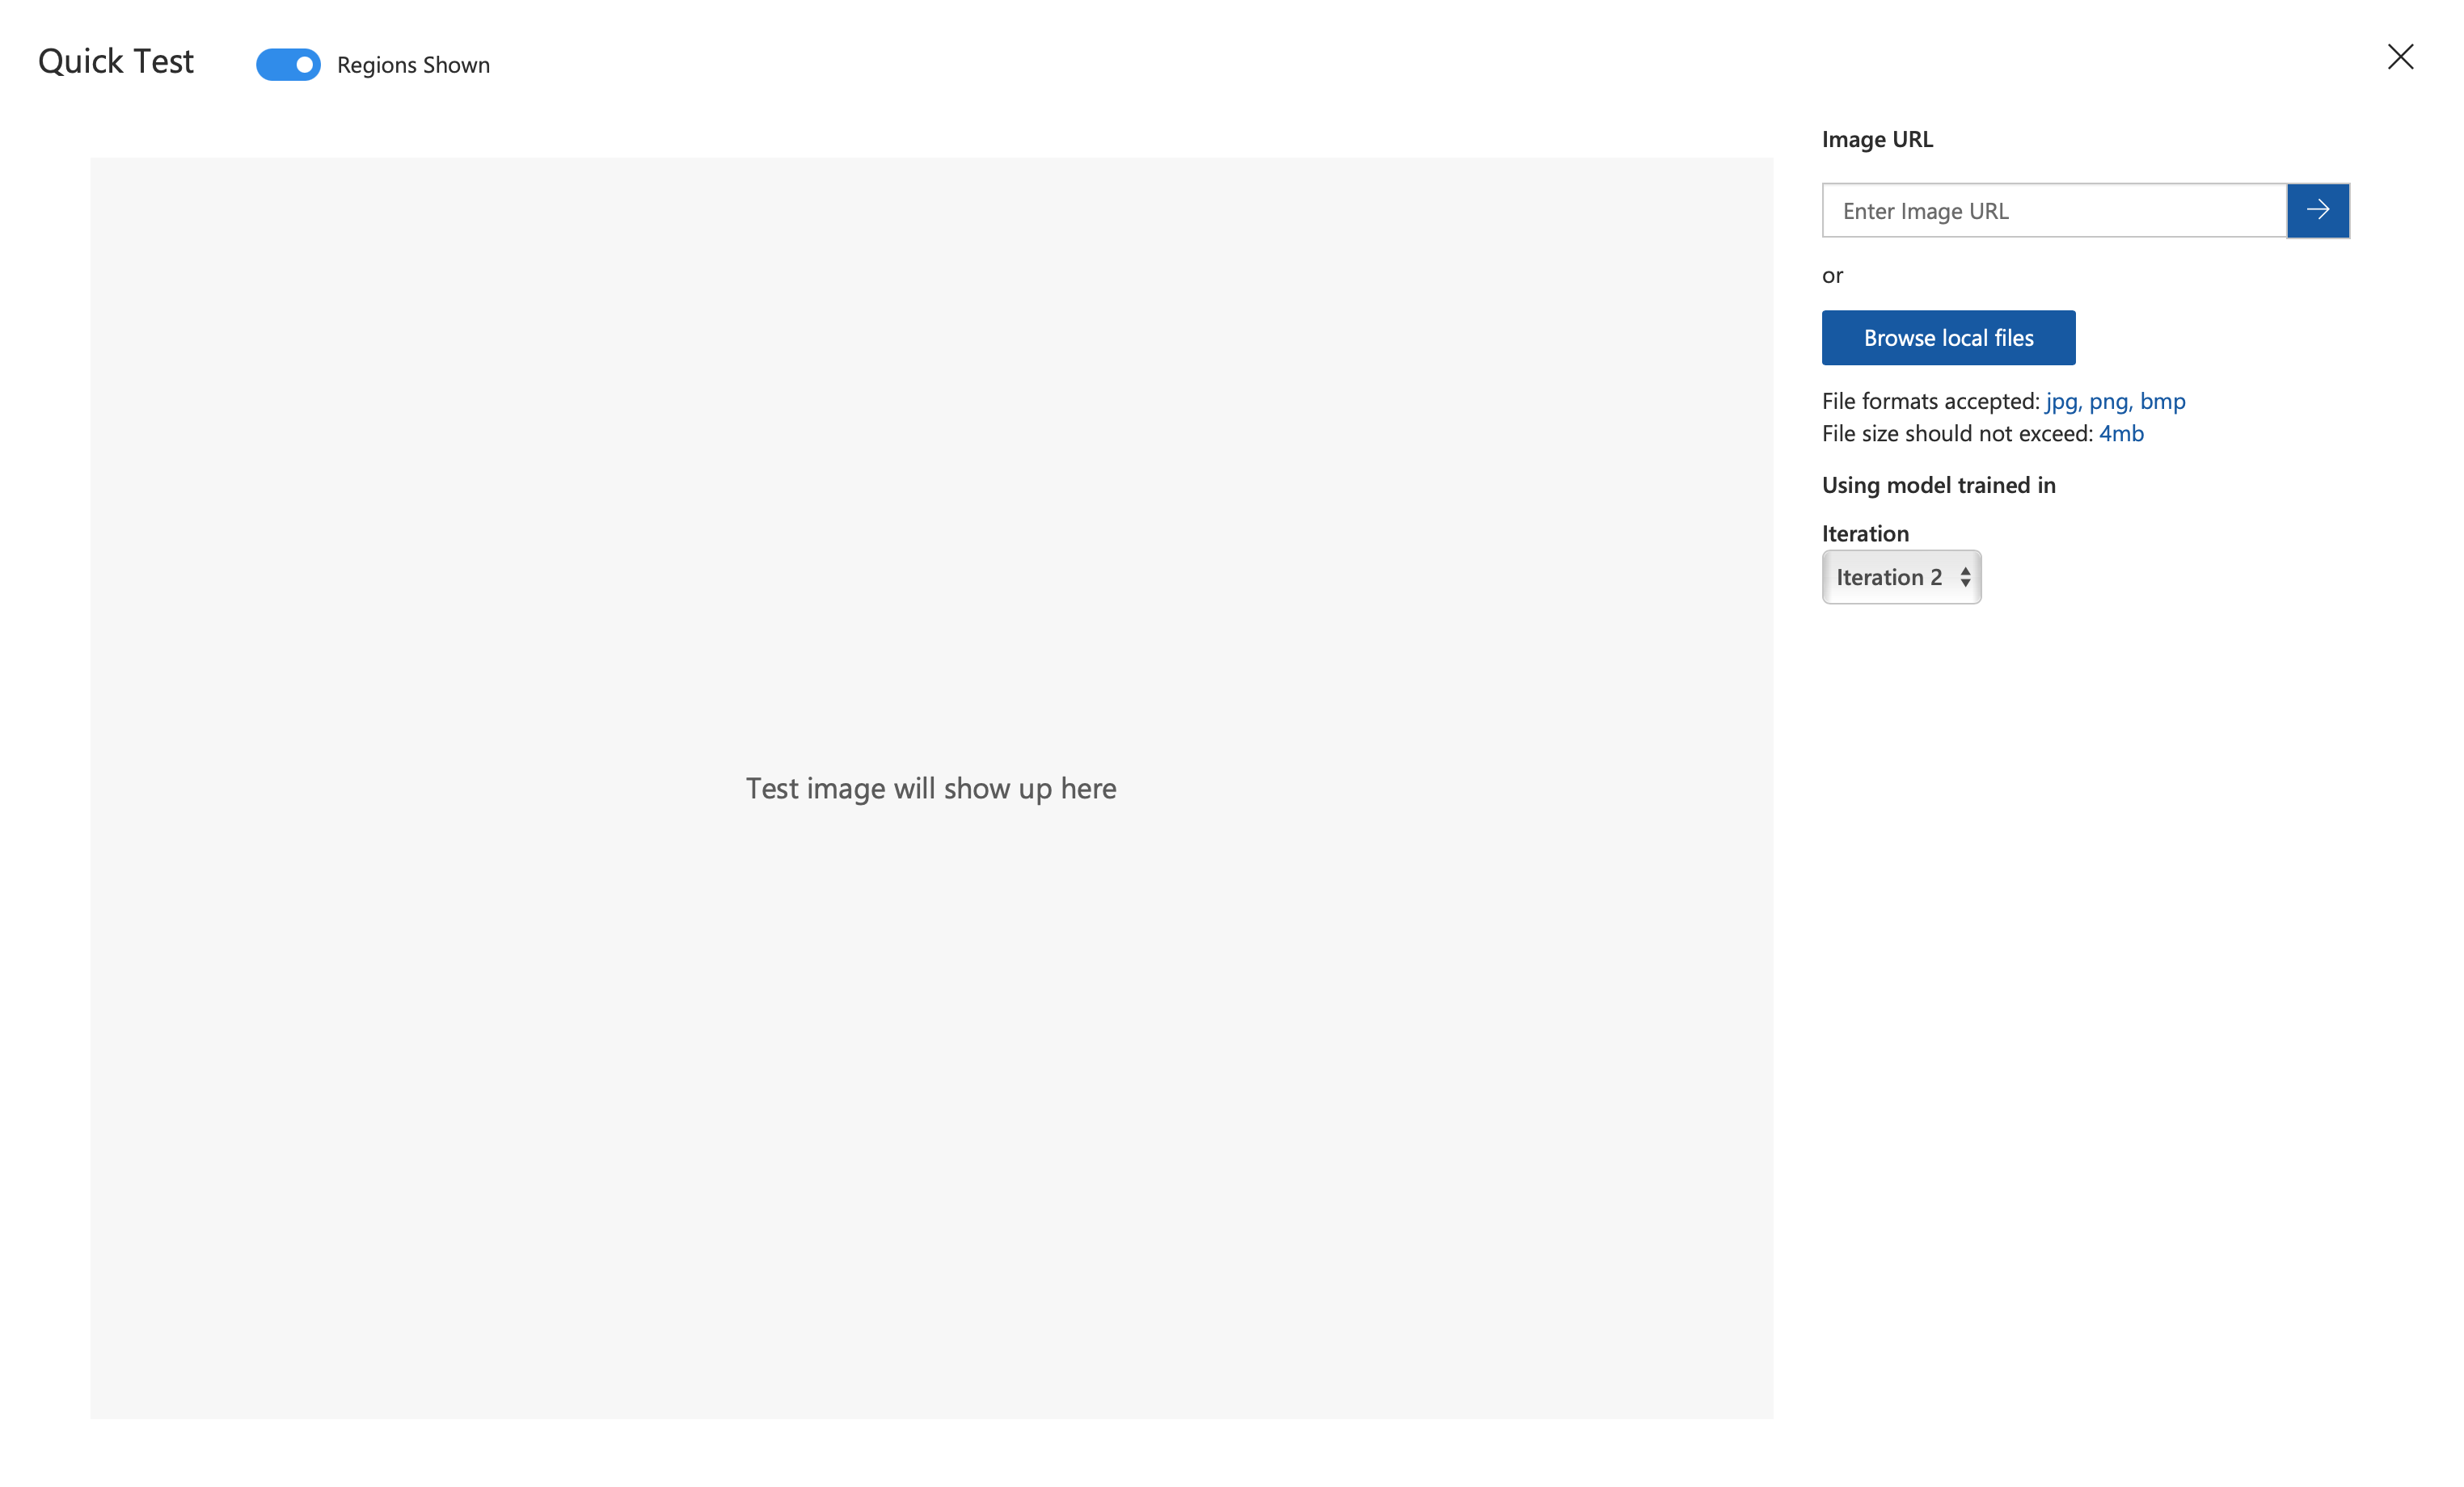
Enter your image URL or browse for a local file to test.
This will take a second, but then will display a region that you can hover over to see the probability of each label.
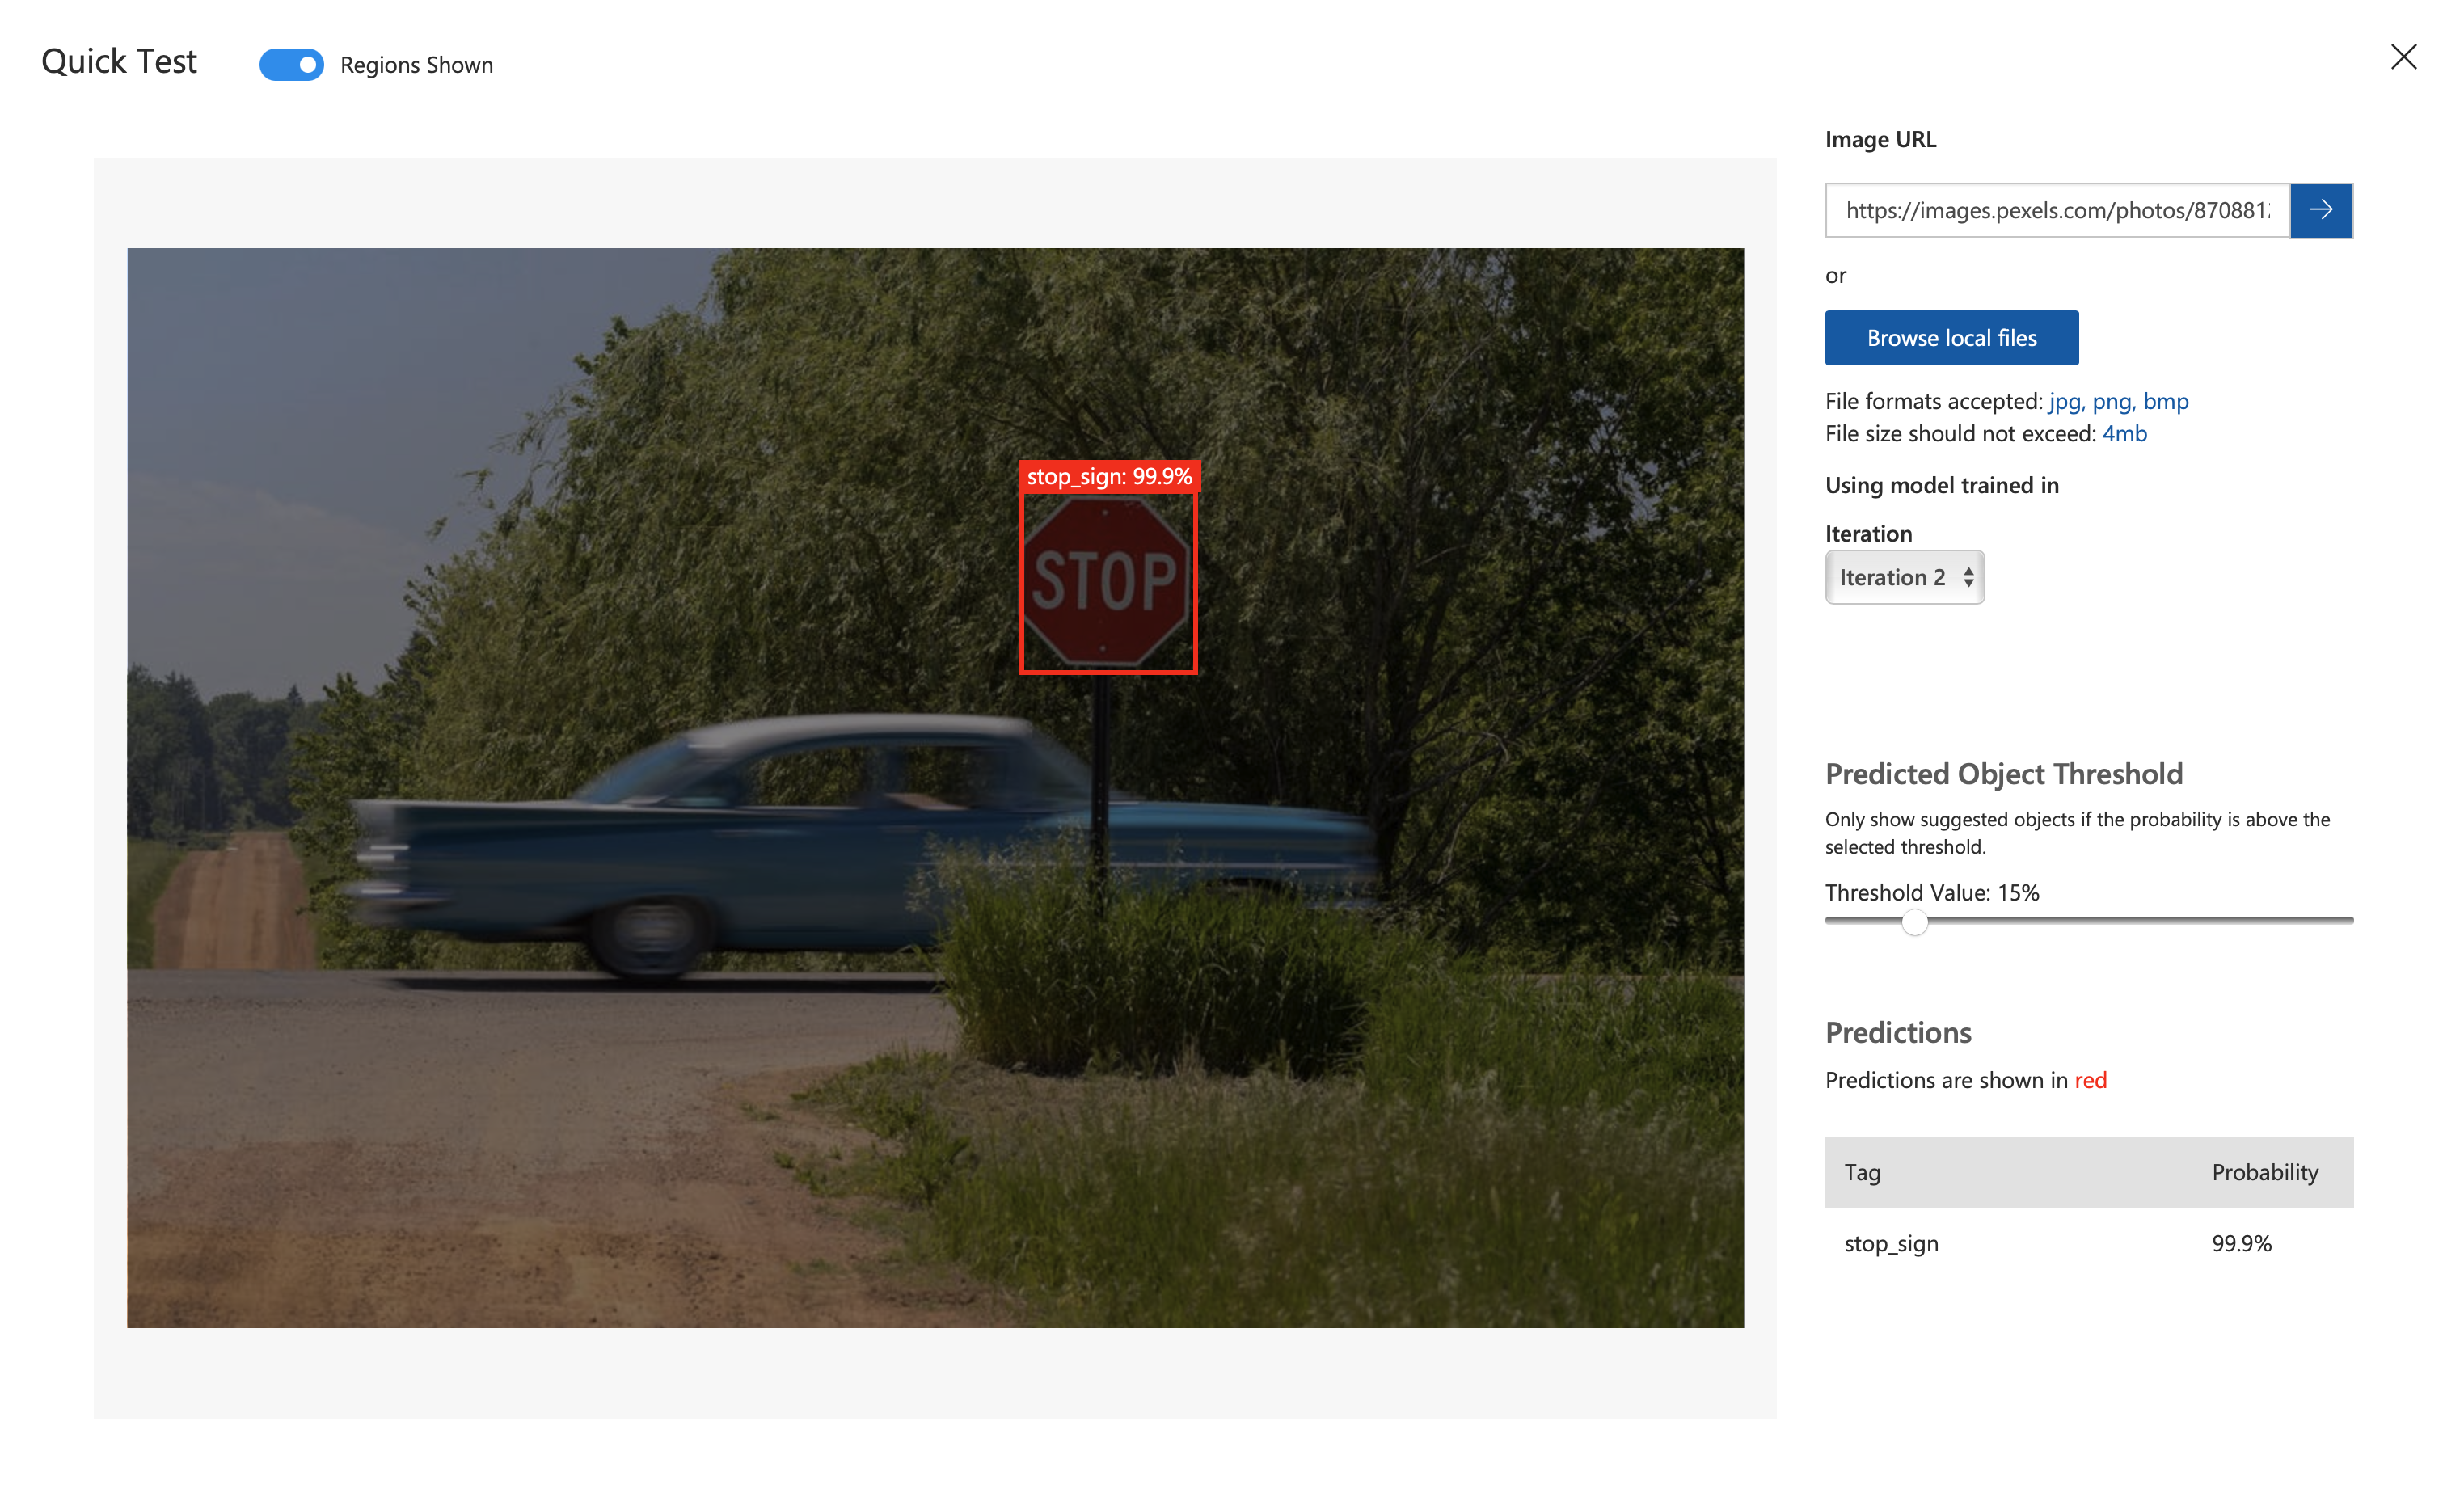
This is a great way to test your model a little bit to see if it's working as expected.
Predict using Node.js
Now we are going to export our model to make predictions using Node.js.
Navigate to the Performance section in Custom Vision.
Near the top of that screen there will be an Export button.
That will bring up a dialog to choose your platform.
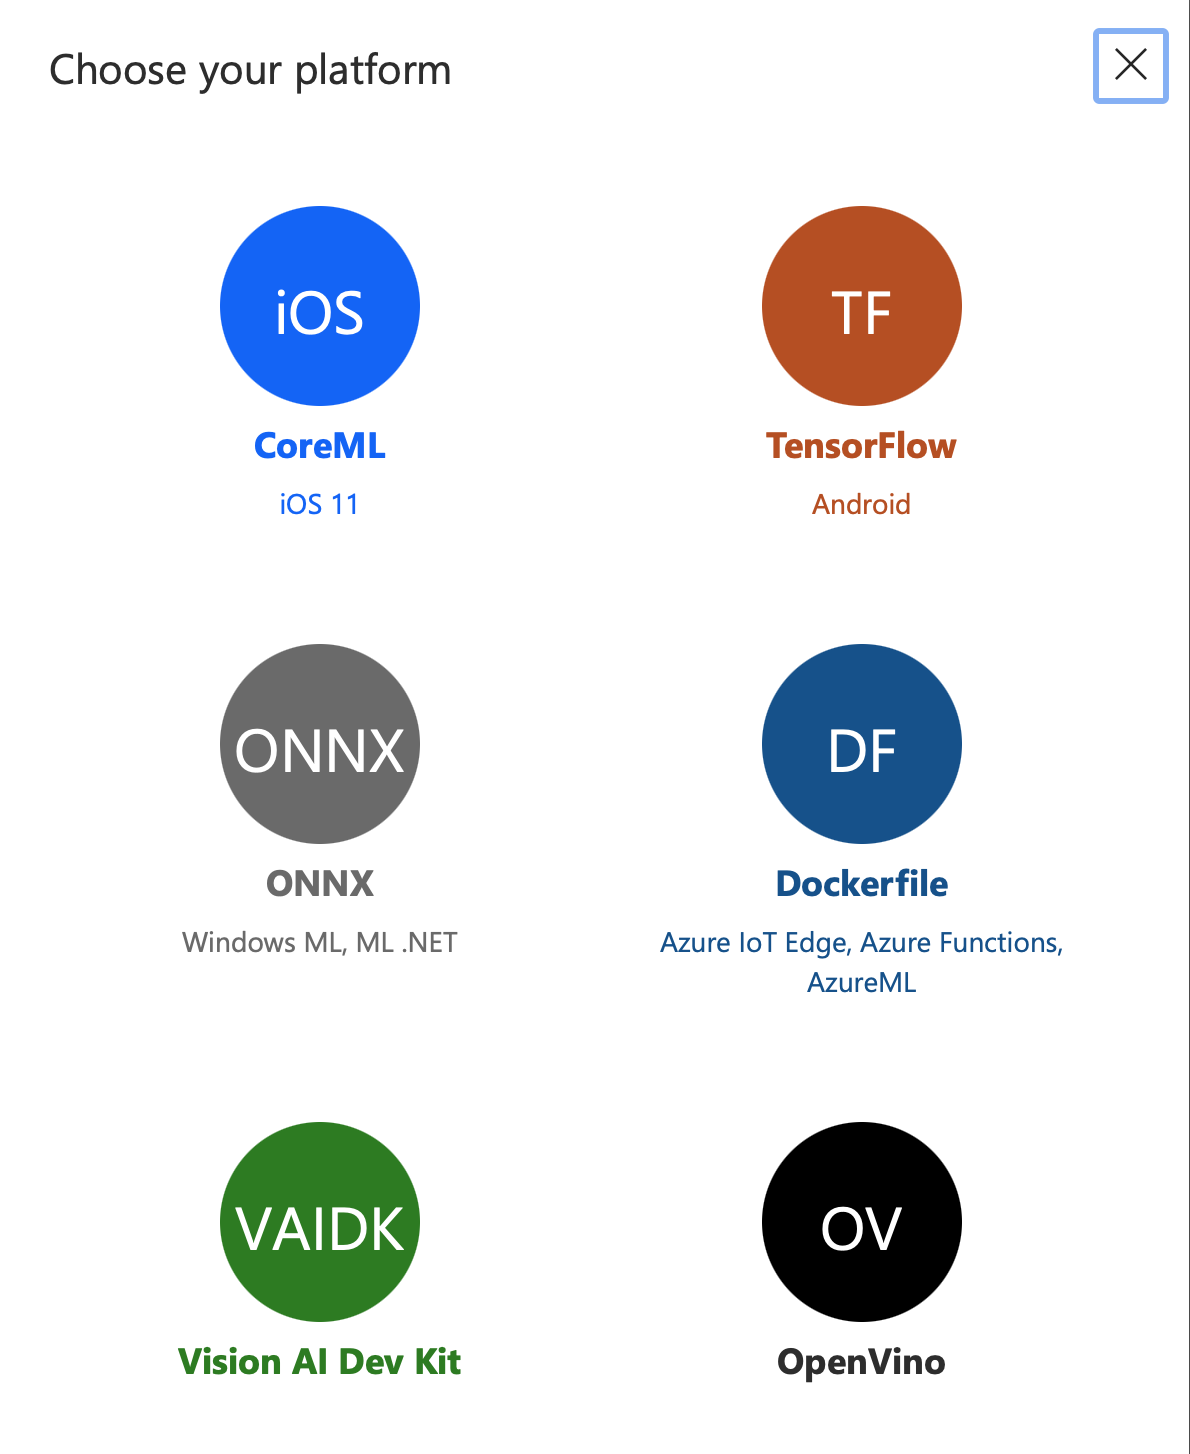
For this example we are going to use TensorFlow.
On the next page choose TensorFlow.js, and click Export.
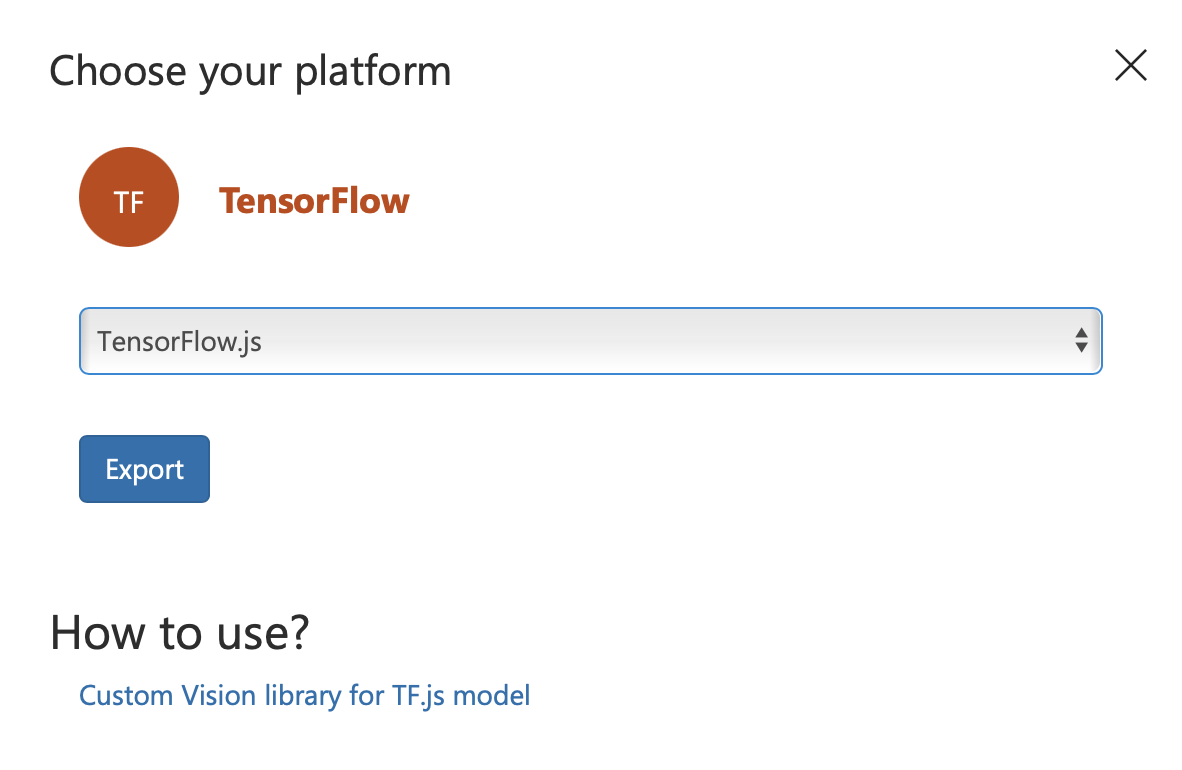
After a moment of processing the button will change to Download. Click that to download your model.
Next, create a new directory on your computer to store the Node.js project.
Run the following command to install the necessary dependencies (npm packages):
npm install @microsoft/customvision-tfjs-node sharp
We use @microsoft/customvision-tfjs-node to handle predictions based on the exported model. sharp is used to overlay a color box over predicted image to we can visualize where the prediction was made.
Next, create a new file called index.js and copy the following code into that file. You will need to modify the Dynamic Properties section with your modelPath, imagePath, exportImagePath, and LabelColors. You can optionally modify the probabilityThreshold to adjust the minimum probability required to show the prediction in the outputted image.
// Dynamic Properties

// You must use complete paths for the following properties
const modelPath = "/Users/username/Downloads/abcdefg"; // This is the path to the model folder that you downloaded from Custom Vision
const imagePath = "/Users/username/Downloads/image.jpeg"; // This is the path to the image you want to classify
const exportImagePath = "/Users/username/Downloads/image-parsed.jpeg"; // This is a path to a non exist file that will be used to store the output/overlay image
const LabelColors = { // This is a dictionary of colors for labels that will be used to generate the overlay image
	"DEFAULT": "rgba(0, 0, 0, 0.5)",
	// Modify the items below to have the key = each tag name, and the value = the color you want to use to output/overlay the image
	"stopsign": "rgba(216, 58, 62, 0.65)",
	"onewaysign": "rgba(59, 217, 211, 0.65)"
};
const probabilityThreshold = 0.5; // 0.5 = 50% (only predictions that are >= to this value will be shown in the output image)

///////////////////////////////////////////////////////////////////////////////

// Code (you shouldn't need to modify this)

// External dependencies (npm packages)
const vision = require("@microsoft/customvision-tfjs-node");
const sharp = require("sharp");

// Internal dependencies
const fs = require("fs").promises;
const path = require("path");

(async () => {
	// Create a new ObjectDetectionModel instance
	const model = new vision.ObjectDetectionModel();
	// Load the model.json file from the modelPath defined in the Dynamic Properties above
	await model.loadModelAsync("file://" + path.join(modelPath, "model.json"));
	// Read the image into memory
	const image = await fs.readFile(imagePath);
	// Execute the model on the image
	const result = await model.executeAsync(image);
	// Get labels.txt from the modelPath and parse it into an array of strings
	const labels = (await fs.readFile(path.join(modelPath, "labels.txt"), "utf8")).split("\n");
	// Create an empty array to store the classification data
	let objectClassifications = [];
	// Loop through each prediction
	for (let i = 0; i < result[0].length; i++) {
		// Get the label index (this will correspond to the labels.txt file)
		const labelIndex = result[2][i];
		// Get the label text value from the labels.txt array created previously
		const label = labels[labelIndex];
		// Add the bounding box coordinates, probability, and label to the classification data
		objectClassifications.push(new ObjectClassification(result[0][i], result[1][i], label));
	}
	// Generate new overlay image
	const newImageResult = await generateOverlayImage(image, objectClassifications);
	// Write new overlay image to disk
	await fs.writeFile(exportImagePath, newImageResult);

	// Print details to console
	console.log(new Array(5).fill("\n").join(""));
	console.log(objectClassifications.filter((item) => item.probability >= probabilityThreshold).map((item) => `${item.label}: ${item.probability}`).join("\n"));
	console.log("File written to: ", exportImagePath);
	console.log("Done!");
})();

// Class to store classification details
class ObjectClassification {
	constructor(bounds, probability, label) {
		this.bounds = {
			"x1": bounds[0],
			"y1": bounds[1],
			"x2": bounds[2],
			"y2": bounds[3]
		};
		this.probability = probability;
		this.label = label;
	}
}

// Function to generate overlay/output image
const generateOverlayImage = async (imageData, classificationData) => {
	// Import image data `fs.readFile` into a sharp instance
	const image = sharp(imageData);
	// Get metadata for image (width & height)
	const metadata = await image.metadata();
	// Filter classification data to only include predictions that meet the probability threshold and map through each
	const compositeArray = classificationData.filter((item) => item.probability >= probabilityThreshold).map((item) => {
		// Get bounds for the prediction
		const bounds = item.bounds;

		// Get left, top, height and width of bounding box
		const left = Math.round(bounds.x1 * metadata.width);
		const top = Math.round(bounds.y1 * metadata.height);
		const height = Math.round(Math.abs(top - (bounds.y2 * metadata.height)));
		const width = Math.round(Math.abs(left - (bounds.x2 * metadata.width)));

		// Output sharp compatible object to pass into composite function
		return {
			"input": {
				"create": {
					width,
					height,
					"channels": 4,
					// Use background color from LabelColors dictionary defined above for the given label, and fall back to DEFAULT if label can't be found
					"background": LabelColors[item.label] || LabelColors.DEFAULT
				}
			},
			top,
			left
		}
	});

	const finalImage = await image.composite(compositeArray).toBuffer();
	return finalImage;
};
Now you can run node index.js and view the output.
You can see below that it outputs an image with our same bounding box as shown in our Custom Vision Quick Test.
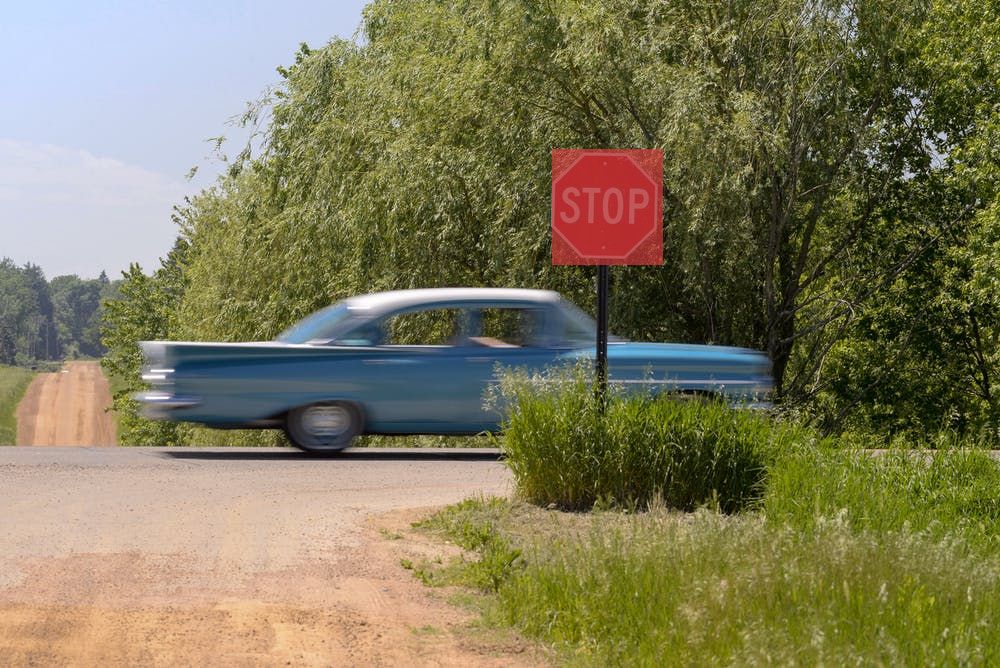
In the console you can also see that it outputs the probability of each prediction as well, which matches what we see in the Custom Vision Quick Test.
stop_sign: 0.9998469352722168
There are a lot of possibilities here. You can expand this code to set it up behind an Express.js server to make predictions for uploaded images. You could also convert this into a more robust CLI tool that accepts parameters from the command line itself, or even makes predictions based on an entire directory of images.
Predict using CoreML
This time we are going to be making predictions in a Swift iOS application using CoreML. This will allow you to take your phone and take a picture and have it make predictions based on our model.
Same as with our Predict using Node.js section above, we are going to export the model in Custom Vision, but this time for CoreML.
Navigate to the Performance section in Custom Vision.
Near the top of that screen there will be an Export button.
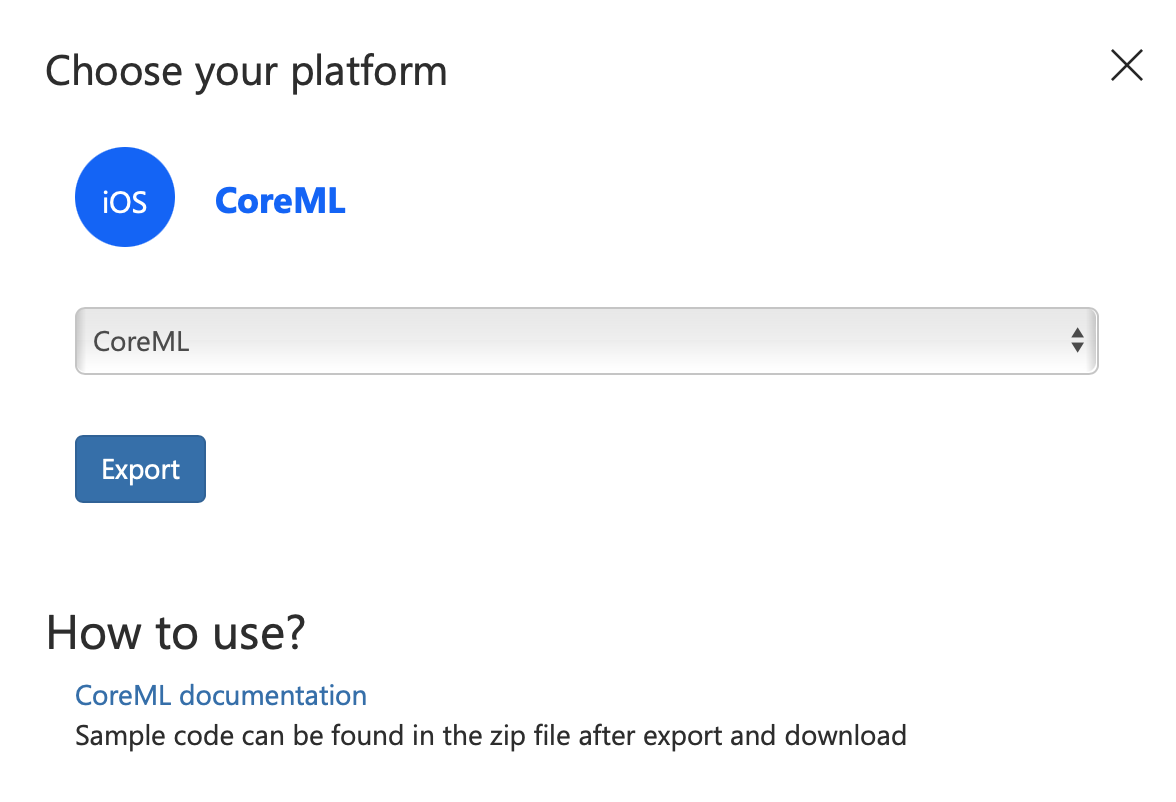
That will bring up a dialog to choose your platform.
For this example we are going to use CoreML.
On the next page choose CoreML, and click Export.
After a moment of processing the button will change to Download. Click that to download your model.
Next, clone my example GitHub repository.
This repository should include everything you need to get started. It has support for both camera and photo library access.
I won't be going over all of the code in this tutorial. I expect you to figure out and understand basic things like the IBOutlets and IBActions and how they are being used. Additionally, I won't really be going over the bounding box code and UIImageView extensions. For this tutorial I'll focus on the machine learning/CoreML code.
First, I dragged the .mlmodel file into the project from the Custom Vision export. I then renamed it from model.mlmodel to StopSignDetectionModel.mlmodel to be more clear.
You can click on the .mlmodel file and open the Preview tab and drag an image into the window to test the model's predictions.
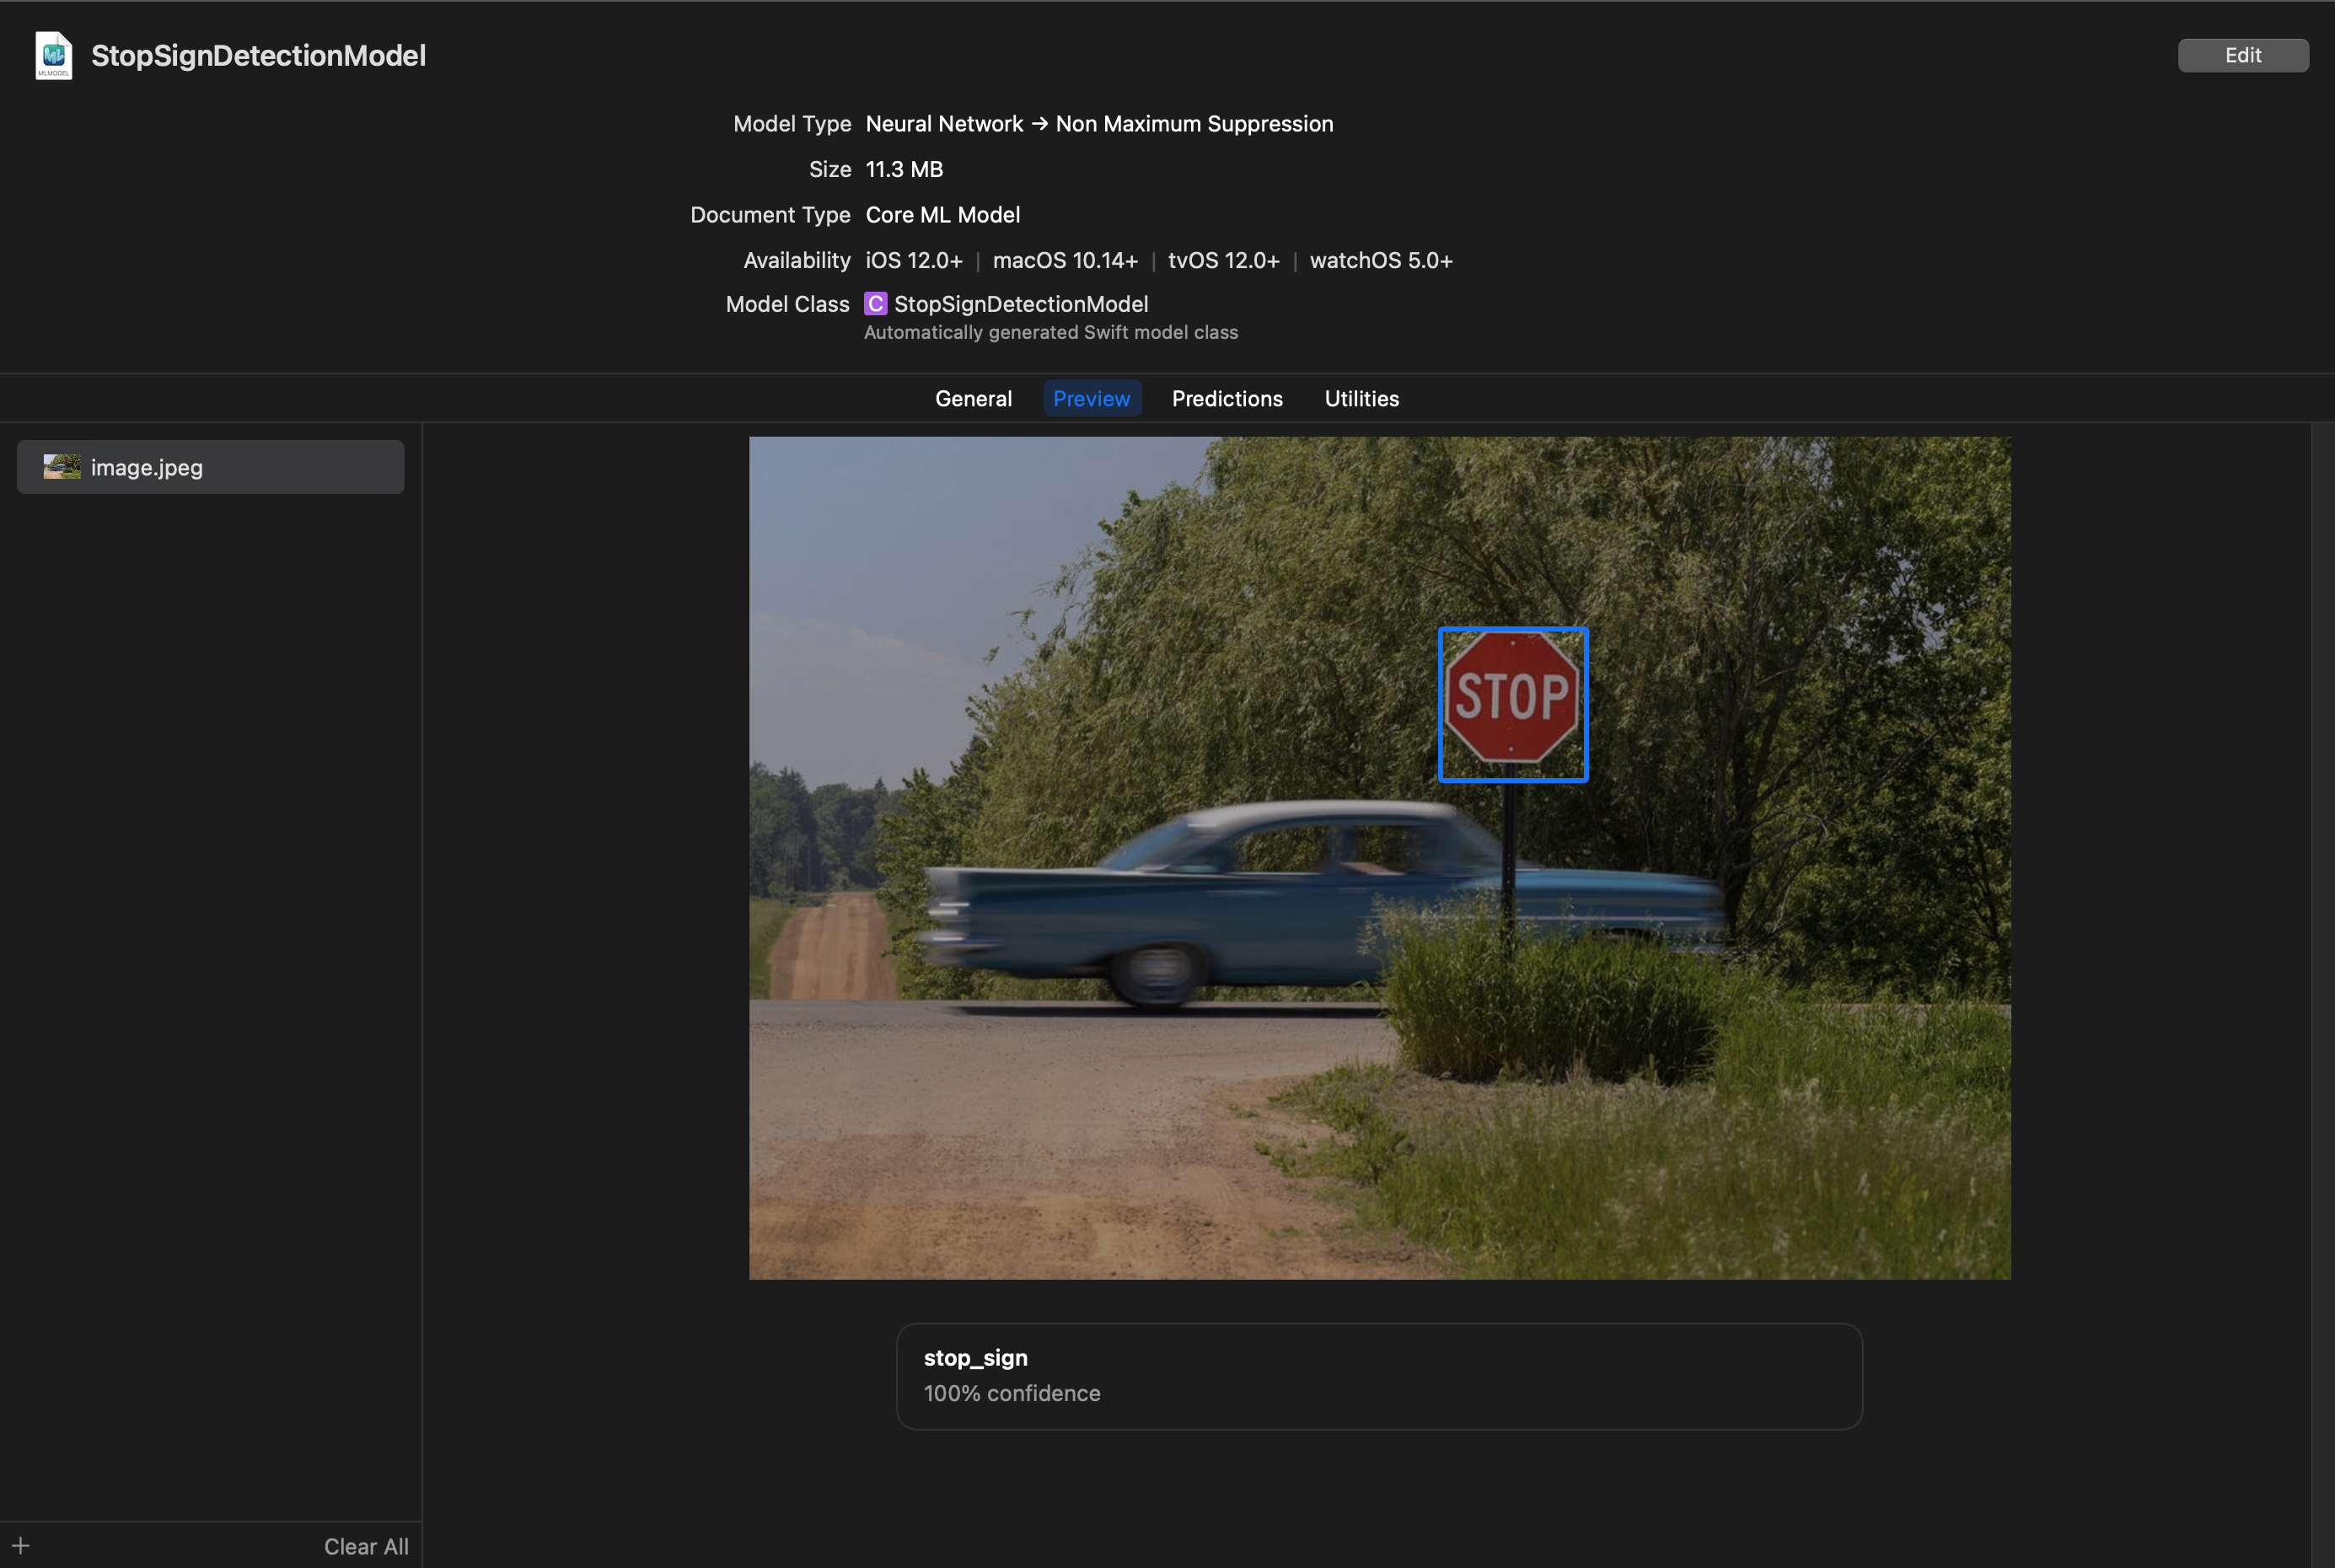
I did notice that the predictions made here are not always identical to the ones made on my iPhone. As you will see later on the bounding box is a bit larger around the bottom and right edges, and the confidence level is higher.
Ok let's dive into the code. We'll start in the Classifier.swift file.
The first thing we do is create a model variable.
private lazy var model: VNCoreMLModel? = {
	guard let stopSignDetectionModel = try? StopSignDetectionModel(configuration: MLModelConfiguration()) else { return nil }
	return try? VNCoreMLModel(for: stopSignDetectionModel.model)
}()
The StopSignDetectionModel is a class automatically generated for us based on the name of our .mlmodel file.
THen we have a function to create a classification request. A classification request is basically the request details to make a prediction. It includes details like a completion handler, and the image crop and scale option.
private func classificationRequest(completionHandler: @escaping (VNRequest, Error?) -> Void) -> VNCoreMLRequest {
	guard let model = model else { fatalError("Model should exist") }

	let request = VNCoreMLRequest(model: model) { request, error in
		self.isRunningClassification = false
		completionHandler(request, error)
	}

	request.imageCropAndScaleOption = .scaleFit
	return request
}
Then we get into the actual classification. The function below takes in a UIImage, converts it to a CIImage, and passes it into a VNImageRequestHandler, and preforms the request. The completion handler attached to our request from before will get called when the classification is complete.
func classify(image: UIImage, completionHandler: @escaping (VNRequest, Error?) -> Void) {
	isRunningClassification = true

	// Generate data to pass into classifier
	guard let orientation = CGImagePropertyOrientation(rawValue: UInt32(image.imageOrientation.rawValue)) else { return }
	guard let ciImage = CIImage(image: image) else { fatalError("Unable to create \(CIImage.self) from \(image).") }

	// Create request
	let request = classificationRequest(completionHandler: completionHandler)

	// Run classification
	DispatchQueue.global(qos: .userInitiated).async {
		let handler = VNImageRequestHandler(ciImage: ciImage, orientation: orientation)
		do {
			try handler.perform([request])
		} catch {
			print("Failed to perform classification.\n\(error.localizedDescription)")
		}
	}
}
Back in the ViewController.swift file, let's look at our UIImagePickerControllerDelegate. This is what will be called when the user selects an image from their photo library.
func imagePickerController(_ picker: UIImagePickerController, didFinishPickingMediaWithInfo info: [UIImagePickerController.InfoKey : Any]) {
	guard let image = info[.originalImage] as? UIImage else { fatalError("Can't get image") }

	Classifier.shared.classify(image: image, completionHandler: { request, error in
		DispatchQueue.main.async {
			// Create image view
			let imageView = UIImageView(image: image)
			imageView.frame = self.containerView.bounds
			imageView.contentMode = .scaleAspectFit
			self.containerView.addSubview(imageView)

			// Dismiss image picker
			picker.dismiss(animated: true)

			// Generate bounding boxes
			let results = request.results as? [VNRecognizedObjectObservation]
			results?.forEach { result in
				guard let labelIdentifier = result.labels.sorted(by: { a, b in
					return a.confidence > b.confidence
				}).first?.identifier else { return }
				guard let label = Label(rawValue: labelIdentifier) else { return }

				let rect = self.denormalized(result.boundingBox, in: imageView)
				let layer = BoundingBoxLayer()
				layer.frame = rect
				layer.label = String(format: "%@ %.1f", label.rawValue, result.confidence * 100)
				layer.color = label.color

				self.boundingBoxView?.layer.addSublayer(layer)
			}
		}
	})
}
Basically here we are calling classify on the image, and passing in a completion handler. We take the results of the classification, and sort the labels based on confidence, and then grab the first label. We then convert that into our helper Label enum which connects the label to the color (similar to our Node.js example).
It is important to note that for the results variable we create we map it to an array of VNRecognizedObjectObservation items. This will need to change if you are using Classification instead of Object Detection.
We then create a bounding box, and add it to the sublayer.
The code for camera based classification is pretty similar with the key differences being that we need to clear out old bounding box layers everytime we make a classification, and we also limit the amount of classifications that occur to try to improve performance. Ideally we'd use a more advanced algorithm to improve performance, but for this tutorial, we are just doing the classification every 10 frames if an existing classification is not already running.
That covers the machine learning side of things. Basically just take your model, pass in the image, and you get back the results. Just as simple as the Node.js example, but with a few more bells and whistles (like camera support).
If we run the application and select a photo, we can see the bounding box along with the confidence level.

All of this is being run fully locally on your Apple Device. No internet connection required.
Conclusion
In this post we went from nothing to having a fully working machine learning system that can be used to detect objects in images. Although this just scratches the surface of what is possible, hopefully it is a good introduction if you want to get machine learning up and running quickly.
One thing I truly value about this system is that the classification is all handled locally. Although Azure Custom Vision does offer a tool to classify images using an API endpoint, there are additional costs for that system. For low scale machine learning, it is much more efficient to do the classification locally.
As a complete side note while working on this project, very disappointed in Microsoft for not maintaining VoTT. 233 outstanding issues and seems like no one from Microsoft is replying at all. From a major company, I believe it is expected to archive repositories if they are no longer being maintained. Resources and priorities change, however it takes almost no effort to inform future users that a project is no longer being maintained.
Additionally, I really hope that Tensorflow adds support for Apple Silicon chips soon. The lack of support for this made this post more difficult to write and test.
FAQ
What is the difference between Classification & Object Detection?
Classification is for classifying the image itself into different categories. This would be used for things like detecting an image of a sunset, or a beach. These classifications don't really have an "object" in them, so they are more like "what is this image looking like?". In that case you would use classification.
Object Detection is more straight forward. This is what we covered in this post, and is for detecting specific objects within an image that have clear bounding boxes.
What is the difference between General (compact) & General (compact) [S1] domains in Custom Vision?
You can find more information on this page.
However, I found that General (compact) did not work as expected with CoreML. Which is why I used General (compact) [S1] instead.
Why is it recommended to use multiple tags?
I found that when using CoreML, only having 1 tag caused classifications to not occur at all. Once I added a second tag, it was able to make predictions as expected. This only occurred with CoreML predictions (ie. having 1 tag worked fine with Node.js based predictions).